
Private Chatbot integration
In this tutorial you will learn how to use your Salesbot features in order to send messages from external services into your Kommo chat channels.
The most common case is connecting some LLM service to Kommo to analyze messages coming to your account through some chat channels and then provide answers to them composed by the LLM.
Chats API methods won't let you do the same since each integration has its own chat channel and you can't access them via your own custom channel. You can send messages either manually or via Salesbot to those channels.
Salesbot for sending messages
Salesbot is a bot that can be programmed to perform certain actions in Kommo. It helps to receive data from users via messengers (Telegram, Facebook Messenger, Instagram) and sends messages to any chat channel connected to your Kommo account.
Salesbot has also a bunch of handlers which might be useful for enhancing its functionality. For instance, widget_request handler lets you send webhooks to external URLs with the specified data from Kommo to your widget and get response from your widget back to Kommo.
widget_requestis a handler we will be using in this tutorial for sending messages from the external services to Kommo
What to begin with?
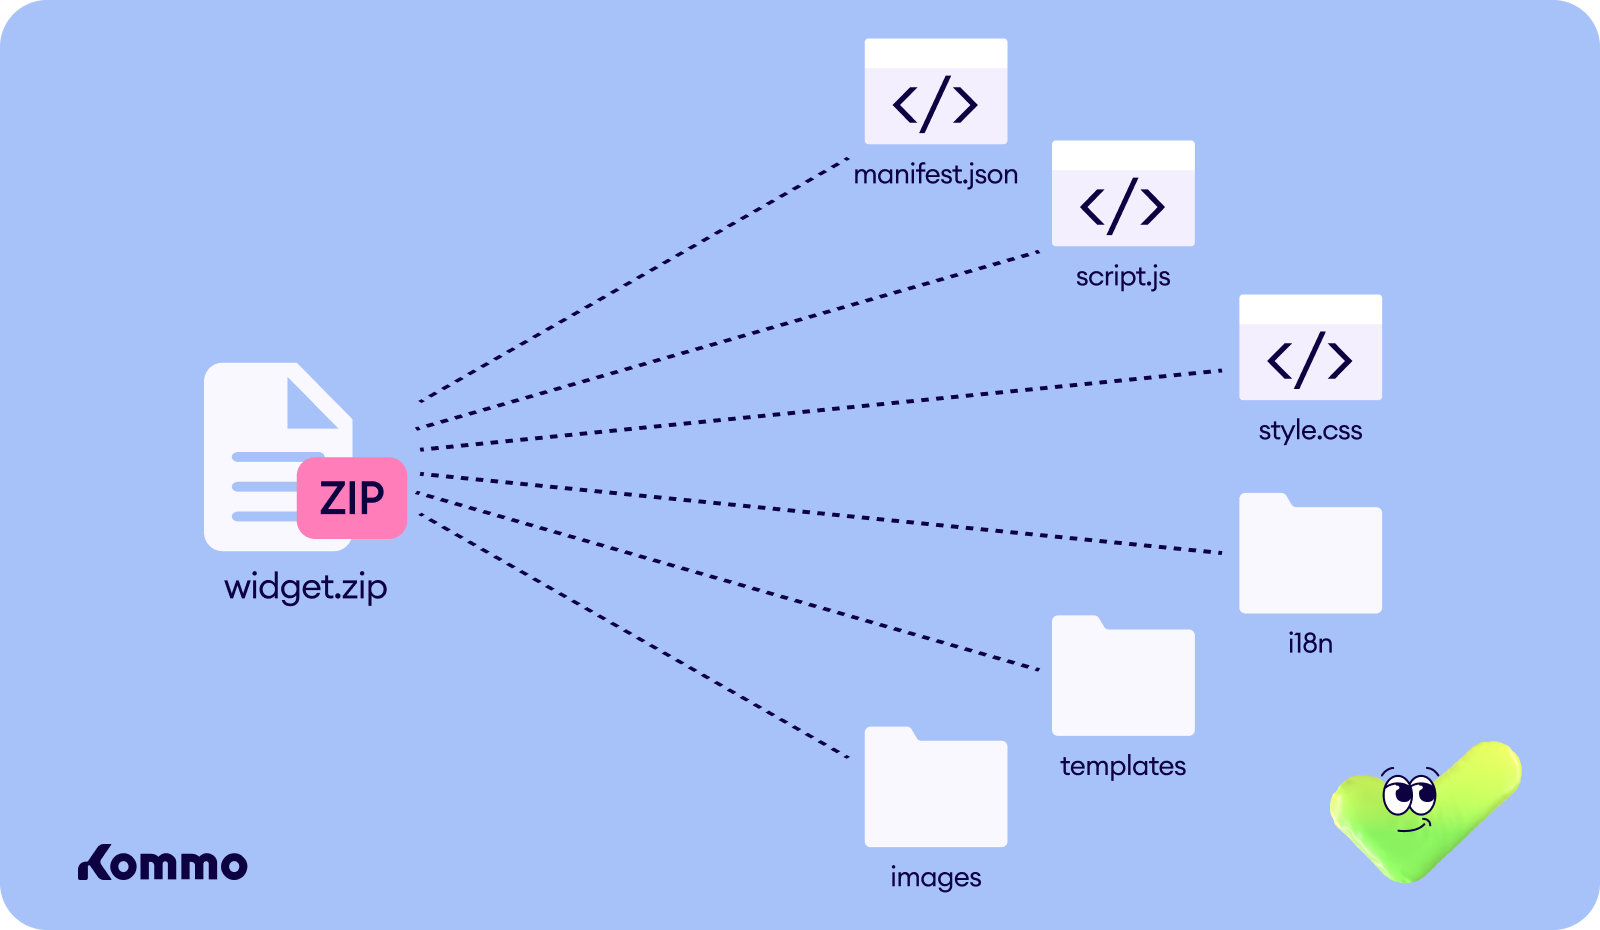
First, you need to understand that working with widget_request requires you to have a widget uploaded for your integration and initialized within Salesbot location.
You need at least Advanced plan to use WebSDK and upload custom widgets to your Kommo account!
1. Create an integration
Start off by creating an integration in your Kommo account following the steps:
- Log in as an account administrator
- Go to Settings → Integrations
- Click the Create integration button
- Submit the simple form. Check more information on how to create a private integration here.
2. Compose your widget
A widget is a user interface component that is used to display data in specific areas, interact with users, or adjust settings by administrators.
Compose your widget according to the documentation.
3. Widget in Salesbot
In order to make your widget work within Salesbot don't forget to add all the necessary locations and objects into your widget files. Read more on Salesbot SDK here.
manifest.json
- Specify the
salesbot_designerlocation
{
  ...

  "locations": [
    "salesbot_designer"
  ],

  ...
}- Add the
salesbot_designerobject
"salesbot_designer": {
  "logo": "/widgets/my_widget/images/image.jpg",
  "handler_name": {
    "name": "settings.handler_name",
    "settings": {
      "text": {
        "name": "settings.text",
        "default_value": "Hello, i am Salesbot!",
        "type": "text",
        "manual": true, // true - the user must enter a value,
 // false - the user selects a field value.
      },
      "link_to": {
        "name": "settings.link",
        "default_value": "www.kommo.com",
        "type": "url",
      }
    }
  }
}
This object describes the fields for displaying the widget settings interface in the Salesbot designer:
The fields in the settings property can have the following type options:
- text
- numeric
- url (link)
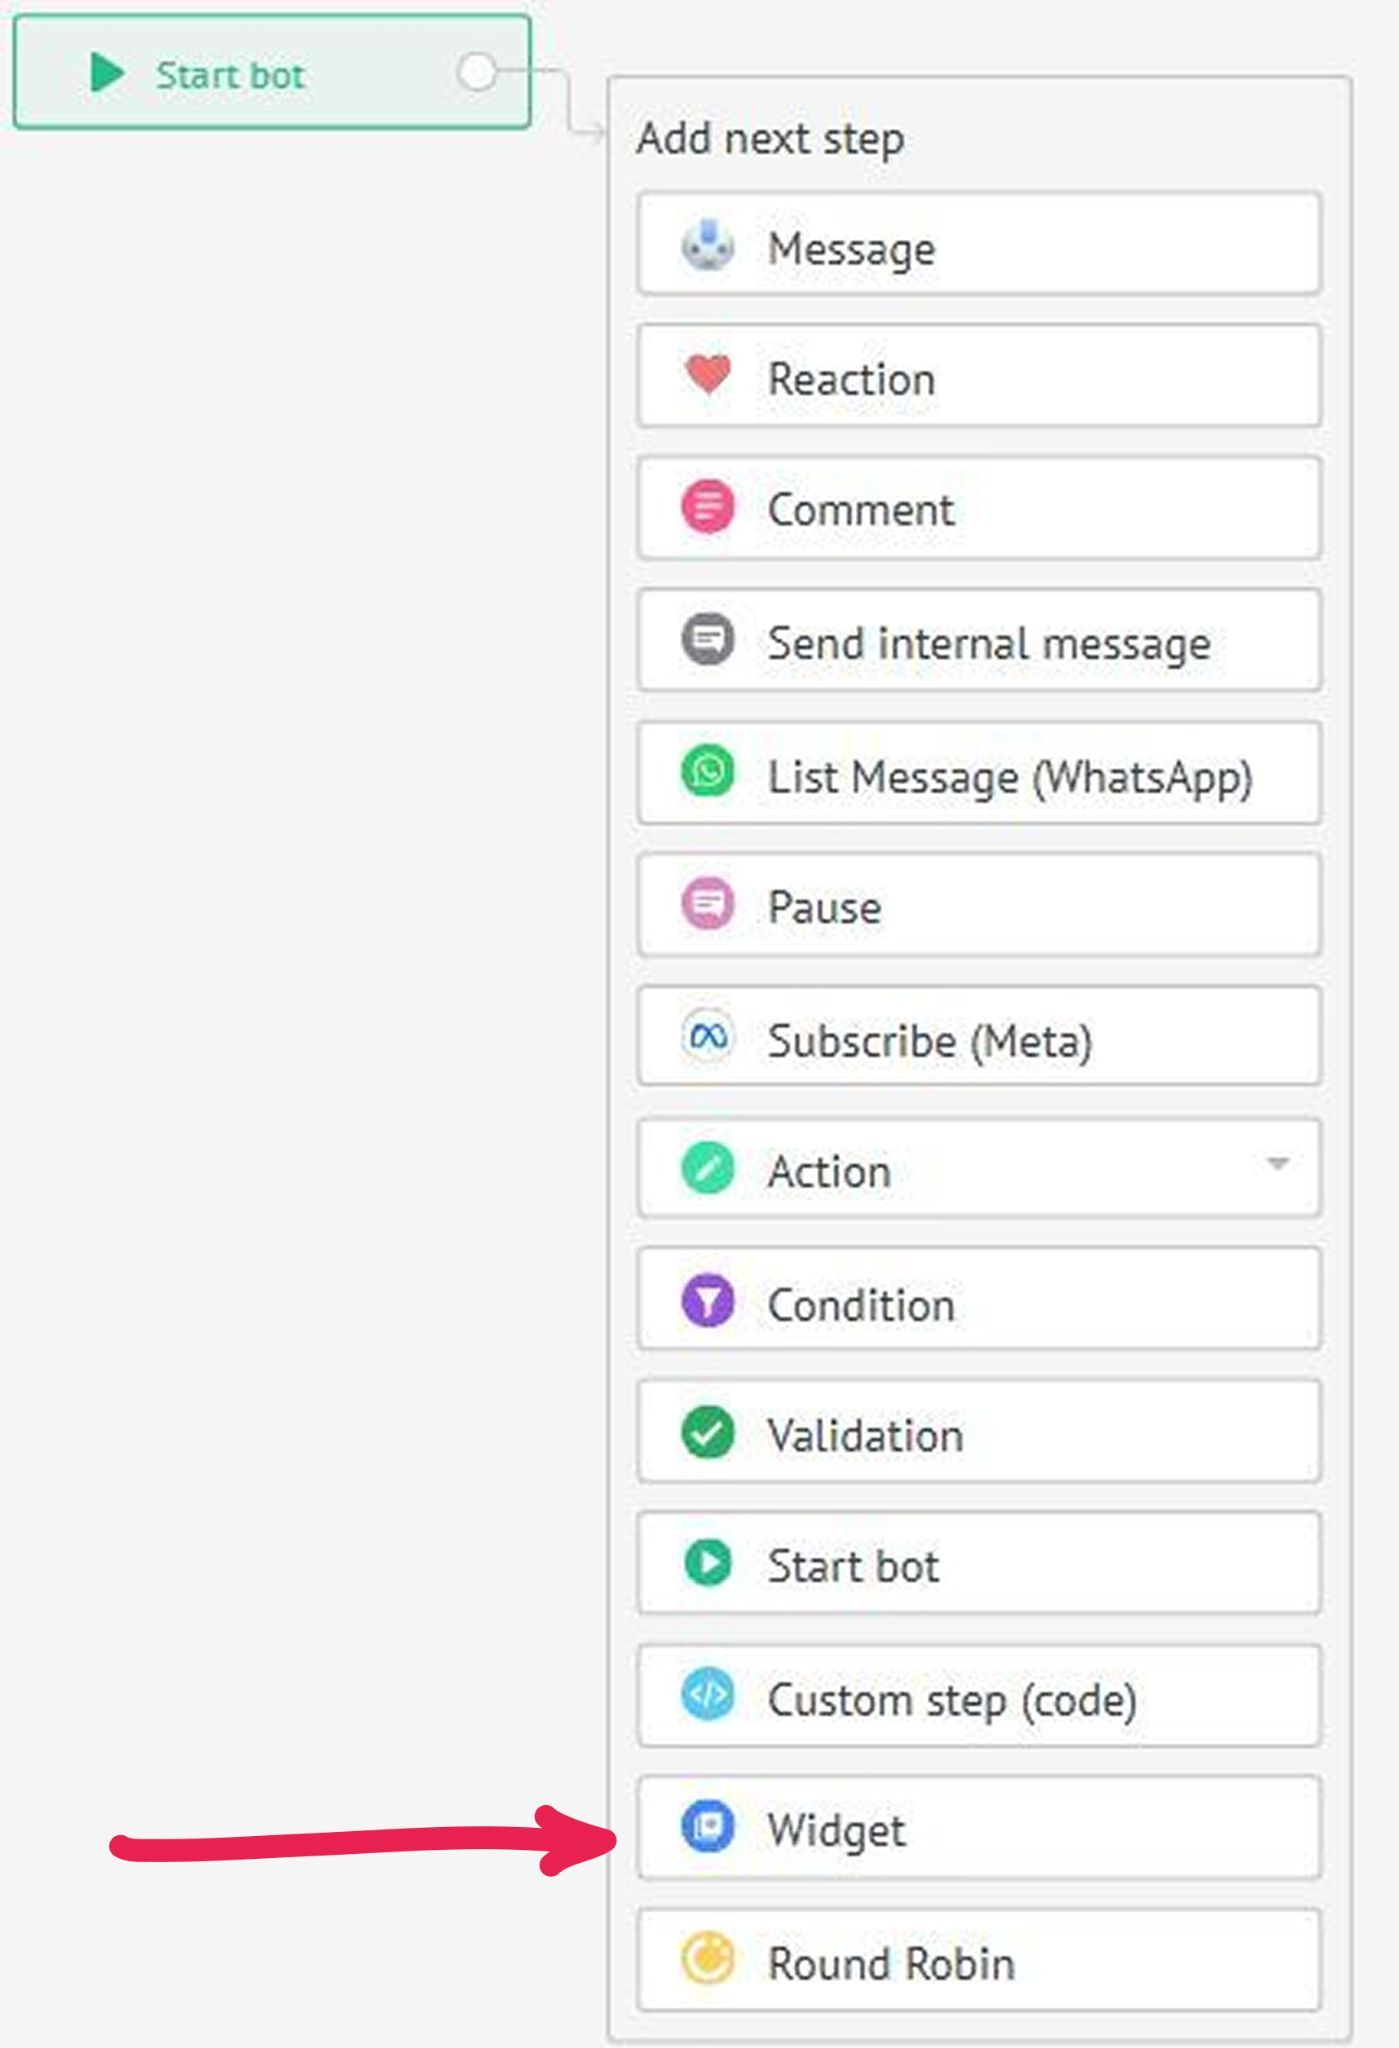
If these settings are specified correctly, the widget will appear in the modal window of the Salesbot designer widgets, for example:
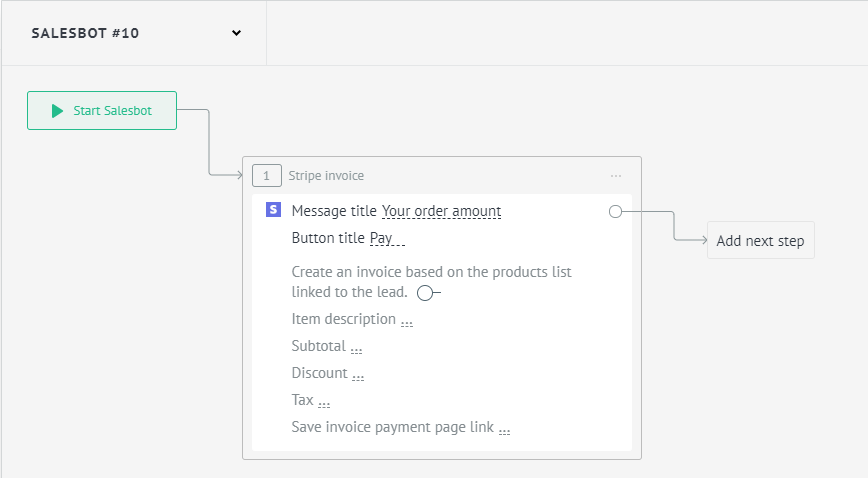
Example of a widget in the Salesbot step
script.js
The settings for each handler are specified in the manifest.json file and are then used in the code for Salesbot. The following callbacks can be added to script.js:
onSalesbotDesignerSave
After the user has configured their sequence in the Salesbot designer and clicked the Save button, the onSalesbotDesignerSave callback is executed in the widget.
The method should return a string in the format of JSON code for the Salesbot, taking into account the bot's exit codes.
It accepts the following inputs:
handler_code(the handler code of the object in thesalesbot_designerobject)params(the widget settings in the specified format)
onSalesbotDesignerSave: function (handler_code, params) {
  const request_data = {
    message: params.message,
  };

  if (APP.getBaseEntity() === 'lead') {
    request_data.lead = '{{lead.id}}';
  };

  return JSON.stringify([
    {
      question: [
        {
          handler: 'widget_request',
          params: {
            url: 'https://example.com/webhook',
            data: request_data,
          },
        },
        {
          handler: 'goto',
          params: {
            type: 'question',
            step: 1,
          },
        },
      ],
    },
    {
      question: [
        {
          handler: 'conditions',
          params: {
            logic: 'and',
            conditions: [
              {
                term1: '{{json.status}}',
                term2: 'success',
                operation: '=',
              },
            ],
            result: [
              {
                handler: 'exits',
                params: {
                  value: 'success',
                },
              },
            ],
          },
        },
        {
          handler: 'exits',
          params: {
            value: 'fail',
          },
        },
      ],
    },
  ]);
},
salesbotDesignerSettings
When the user clicks the Add button under the widget, the salesbotDesignerSettings callback will be triggered. Using this callback, you can change the appearance of your widget's block in the designer.
We won't be covering salesbotDesignerSettings callback in the tutorial, but you can find out more information on the callback in the Salesbot SDK section.
4. widget_request webhook
widget_request webhookThe structure of the widget_reuqest handler is presented below. You can specify what data to send from Kommo to your server, placeloders from the show handler can be used to pass dynamic data. Let's say you want to pass a client message to your widget. It can be accomplished by providing {{message_text}} placeholder to our data.message key.
You can add more than one key to the
params.dataobject
{
  "handler": "widget_request",
  "params": {
    "url": "https://example.com/endpoint",
    "data": {
      "message": "{{message_text}}",
      "from": "widget"
    }
  }
}
onSalesbotDesignerSave: (_handler_code, params) => {
const hookUrl = params?.text || '';
const requestData = { from: 'widget', message: '{{message_text}}' };
const firstStep = createStep([
{
handler: 'widget_request',
params: {
url: hookUrl,
data: requestData,
}
}
]);
const flow = [firstStep];
return JSON.stringify(flow);
}| Parameter | Data type | Description |
|---|---|---|
| url | string | The URL endpoint of the external server. |
| data | array | An array of any data containing strings and/or placeholders from "show" handler section, for example, {{message_text}}. |
When the Widget step is triggered in the Salesbot flow, data from the previous step will be passed to the specified URL. The url endpoint will receive a POST request. To acknowledge that the webhook has been received, you need to respond within 2 seconds with an HTTP status code 200.
{
"token": "JWT_TOKEN",
"data": {
"message": "Hello! How are you?",
"from": "widget"
},
"return_url": "https://subdomain.kommo.com/api/v4/salesbot/321/continue/123"
}The JWT token is needed to validate the data sent in the request. It is signed with the client's secret key.
5. Widget Response and Resuming Bot Operations
Once the webhook is succefully received and handled on your server, you can pass data back to Kommo and continue the Salesbot flow. In order to resume the bot's operation you need to make a request with the data. The current bot will not continue its operation until it receives the request. Additionally, you will not be able to continue the bot's execution if another bot for the same entity is already running.
If the widget needs to pass any data, it should be put into the data field as an object within the request. If the widget needs to perform an action before the bot continues working, then you can pass a list of handlers to the parameterexecute_handlers, for instance:
{
"data": {
"message": "Hello! How are you doing?"
},
"execute_handlers": [
{
"handler": "show",
"params": {
"type": "text",
"value": "Your text"
}
},
{
"handler": "show",
"params": {
"type": "buttons",
"value": "Press the button",
"buttons": [
"Button 1",
"Button 2",
"Button 3",
"Button 4",
...
"Button 25"
]
}
},
{
"handler": "show",
"params": {
"type": "buttons_url",
"value": "Buttons with links",
"buttons": [
"https://kommo.com"
]
}
},
{
"handler": "goto",
"params": {
"type": "question|answer|finish",
"step": 5
}
}
]
}{
"data": {
"message": "Hello! How are you doing?"
},
"execute_handlers": [
{
"handler": "show",
"params": {
"type": "buttons",
"value": "Press the button",
"buttons": [
"Button 1",
"Button 2",
"Button 3",
"Button 4",
...
"Button 25"
]
}
},
{
"handler": "show",
"params": {
"type": "buttons_url",
"value": "Buttons with links",
"buttons": [
"https://kommo.com"
]
}
}
]
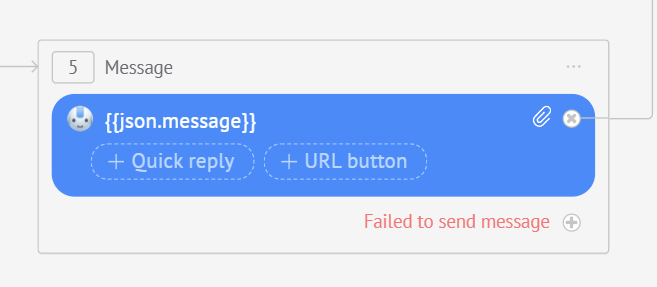
}In the above example we’ve passed a message field to the widget. The widget will be able to get the field’s value (message) in any block after the Widget step by the {{json.message}} key. We have also told the widget bot to display text, buttons, buttons with links and go to step 5 of the widget bot.
Example
We have prepared samples for script.js, manifest.json and i18n/en files to show a simple flow of the Salesbot sending messages from external services.
Please remember that this widget is just a sample but not a business ready integration. You need to create a Salesbot flow by yourself as well!
{
"widget": {
"name": "widget.name",
"description": "widget.description",
"short_description": "widget.short_description",
"version": "1.0.1",
"interface_version": 2,
"init_once": true,
"locale": ["en"],
"installation": true,
"support": {
"link": "https://www.example.com",
"email": "[email protected]"
}
},
"locations": ["salesbot_designer", "settings"],
"tour": {
"is_tour": true,
"tour_images": {
"en": ["/images/tour_1_en.png"]
},
"tour_description": "widget.tour_description"
},
"settings": {
"login": {
"name": "settings.login",
"type": "text",
"required": false
},
"password": {
"name": "settings.password",
"type": "text",
"required": false
}
},
"salesbot_designer": {
"logo": "/widgets/my_widget/images/image.jpg",
"handler_name": {
"name": "salesbot.handler_name",
"settings": {
"text": {
"name": "salesbot.text",
"default_value": "https://webhook.site/",
"type": "text",
"manual": true
}
}
}
}
}
define(['jquery'], function ($) {
return function CustomWidget() {
const self = this;
const createStep = (questions) => ({ question: questions, require: [] });
this.callbacks = {
settings: () => {},
init: () => true,
bind_actions: () => true,
render: () => true,
onSalesbotDesignerSave: (_handler_code, params) => {
        const hookUrl = params?.text || '';
        const requestData = { from: 'widget', message: '{{message_text}}' };

        const firstStep = createStep([
          {
            handler: 'widget_request',
            params: {
              url: hookUrl,
              data: requestData,
            }
          }
        ]);

        const flow = [firstStep];

        return JSON.stringify(flow);
},
destroy: () => {},
onSave: () => true,
};
return this;
};
});
{
  "widget": {
    "name": "Sample widget",
    "short_description": "It's a short description!",
    "description": "This one is a full description!",
    "tour_description": "Tour description of the widget"
  },

  "settings": {
    "login": "User login",
    "password": "Password"
  },

  "salesbot": {
    "handler_name": "Handler name",
    "text": "Text",
    "message": "Message"
  }
}
Once the widget is uploaded into your account, head to Salesbot and choose your widget in the Widget step. Here you get a step with the possibility to specify your webhook URL in the UI editor.

For triggering your Salesbot you can also use general webhook on each incoming message in your account and then send request to run a Salesbot via API for the entity.