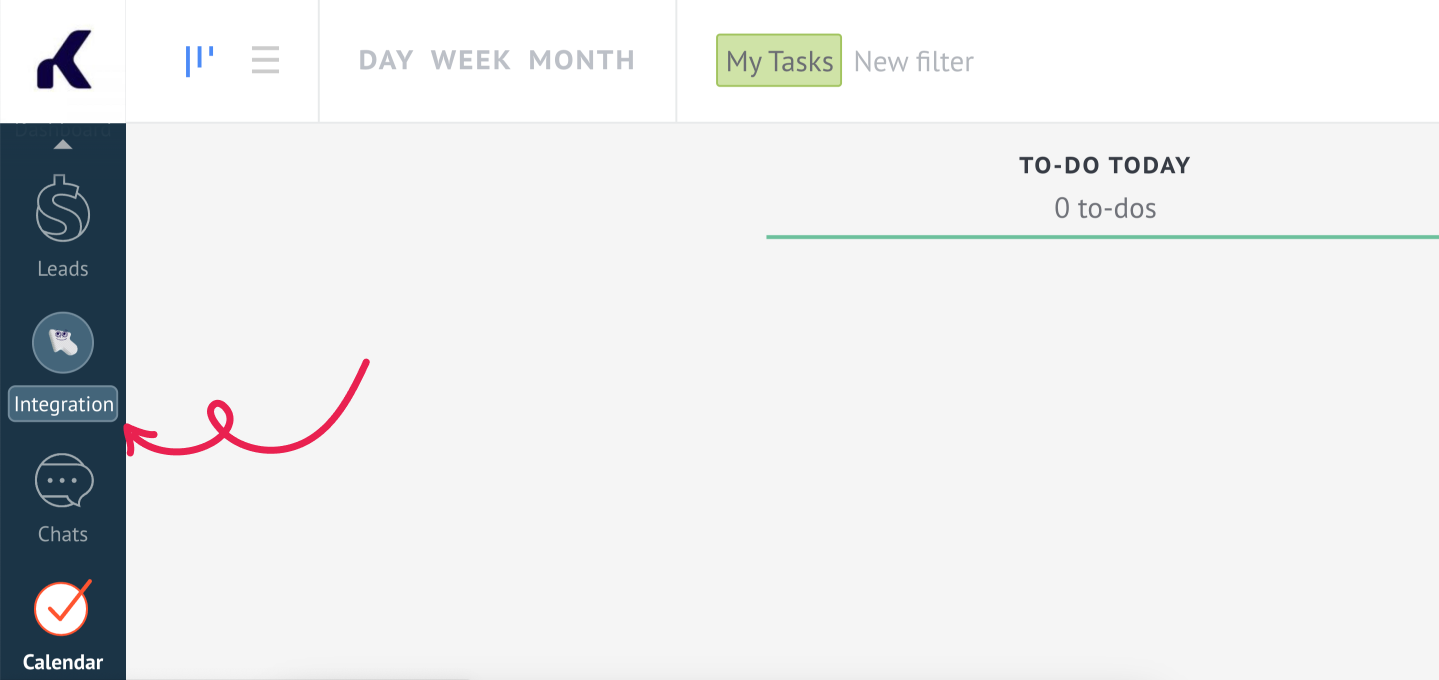
Left menu bar
Your widget will initialize in the left menu if only you create a Public integration.
When you build an integration, you can choose to add a new section to the left menu bar or a subsection within the existing Stats or Settings sections.
Left menu section
To distinguish your integration from the default sections in the left menu, your added section will look the way it is shown on the screen.

To add you own section to left menu bar you need to add the following code to manifest.json
{
  ...

  "locations": [
      "widget_page"
  ],
  "left_menu": {
      "realty_widget_code": {
          "title": "lang.code",
          "icon": "images/home_page.svg",
          "submenu": {
              "sub_item_code_1": {
                  "title": "lang.code", // section lang code
                  "sort": 2
              },
              "sub_item_code_2": {
                  "title": "lang.code",
                  "sort": 1
              }
          }
      }
  },

  ...
}
As shown, you need to add "widget_page" to the list of widget locations. Once done, the "left_menu" property will appear together with the "realty_widget_code" key, which is the code of the left menu bar section.
By default, your new section will be added as the last icon in the menu below Settings, but you can change its position. In the example below, it’s moved to below the Leads section:
{
  ...
  "left_menu": {
       "realty_widget_code": {
            "title": "lang.code",
            "icon": "images/home_page.svg",
            "sort": {
                 "after": "leads"
            },
            "submenu": {
                "sub_item_code_1": {
                     "title": "lang.code"
                },
                "sub_item_code_2": {
                     "title": "lang.code"
                }
            }
       }
  }
  ...
}
Here’s the list of sections that can be entered as an "after" value:
- Dashboard
- Leads
- Tasks
- Stats
- Settings
New left menu
For the new left menu pinned integration will be added to a separate list in the left menu below the default items. They are sorted by creation date (recent first), as well as by the numeric value in the
sortfield. Theafterparameter no longer affects the placement of integration items for the new left menu, as they are now located only within the pinned menu items.Submenu items are sorted only relative to each other by the numeric value in the
sortfield.
You can also hide default system menu bar sections, except for Settings. To do that, use this manifest.json code:
{
  ...
  "left_menu": {
      "stats": {
           "is_hidden": true
      },
      "mail": {
           "is_hidden": true
      }
  }
  ...
}
List of menu bar sections that can be hidden:
- Dashboard
- Leads
- Tasks
- Stats
Stats and settings subsections
Your integration can also be placed as a subsection to the system sections Stats (Analytics) and Settings. You can manage the order of subsections using the "sort"property. Below is an example of the code in the manifest.json to add a new subsection to the Stats (Analytics) section:
{
  ...
  "left_menu": {
      "stats": {
           "submenu": {
               "custom_sub_item_1": {
                    "title": "lang.code"
               },
               "custom_sub_item_2": {
                    "title": "lang.code"
               }
           }
      }
   },
  ...
}
To process the menu bar section clicks, a special callback initMenuPage is provided. This callback recieves the following types of object:
{
     "location": "widget_page", // "stats" or "settings"
     "item_code": "custom_item_1", // only in the created left menu bar sections
     "subitem_code": "sub_item_1" // subsection code
}
"location" receives the entity name, where the menu bar section is located. As we already know, the menu bar section can also be added as a subsection to the existing system sections.
If the user enters the menu bar section subsection, put the code of the menu section in "item_code", code of the subsection in "subitem_code".
Here is an example of the implementation of the initMenuPage callback:
{
  this.callbacks = {
  /**
  * The method is triggered when the user enters custom widget page.
  * We have to render the page based on its current state.
  *
  * @param {Object} params - The current state parameters of the page:
  * @param {string} params.location - The current location (e.g., 'widget-page', 'stats', 'settings')
  * @param {string} [params.item_code] - The item code specified in manifest.json (e.g.,'custom_item_1', only for custom sections)
  * @param {string} [params.subitem_code] - The subitem code specified in manifest.json (e.g.,'custom_sub_item_3',only for subsections)
  */
  initMenuPage: _.bind(function (params) {
  switch (params.location) {
    case 'stats': // For the 'stats' section, we only get subitem_code
      switch (params.subitem_code) {
        case 'sub_item_1':
          self.getTemplate(
            'stats__sub_item_1',
            {},
            function (template) {
              $('#work-area-' + self.get_settings().widget_code).html('Item Analytics, subsection 1');
            });
          break;

        case 'sub_item_2':
          self.getTemplate(
            'stats__sub_item_2',
            {},
            function (template) {
              $('#work-area-' + self.get_settings().widget_code).html('Item Analytics, subsection 2');
            });
          break;
      }

      break;

    case 'settings': //For the 'settings' section, no item_code or subitem_code is passed
      // No specific handling is required for 'settings'
      break;

    case 'widget_page': // For custom widget pages, both item_code and subitem_code are used
      switch (params.item_code) {
        case 'custom_item_3':
          switch (params.subitem_code) {
            case 'sub_item_1':
              self.getTemplate(
                'custom_item_3__sub_item_1',
                {},
                function (template) {
                  $('#work-area-' + self.get_settings().widget_code).html('Item 3, subsection 1');
                });
              break;

            // Handle other subitems for custom_item_3
          }

          break;

          // Handle other custom items
      }

      break;
     }
    }, self),
  }
}
Updated 10 days ago