Create a Public integration
If you are developing an integration that could be useful to all Kommo users, we would be glad to publish it in our Marketplace. For these types of integrations, technical support is provided through a dedicated communication channel with the Kommo Marketplace team.
If you are developing a Public integration, then you should do that under the technical account. This integration must also pass our moderation process to ensure that we can provide support and protect our clients' data and rights.
Capabilites
Public integrations may include a widget that supports the following capabilities:
- Kommo API:
The ability to manipulate and generate data in Kommo including account, users, leads, contacts, tasks, etc. - JS SDK:
A set of functions and objects that facilitates access to the environment (such as information about the widget and the authorized user) and allows for interaction with various interface elements. - Salesbot:
A tool for creating custom scenarios to automate interactions with users via messengers. - Digital pipeline:
A powerful automation tool that allows you to set up triggers to different events, such as incoming emails, calls or messages, lead stage changes, or website visits. - Chats API:
The ability to integrate with different messengers and enable Kommo users to send and receive messages through them. - VoIP API:
Set of API and JS methods that are useful to connect telephony services with Kommo.
Create a public integration
Enter the technical account that you've requested for the integration. Go to Settings ➡ Integrations ➡ Create Integration ➡ Public
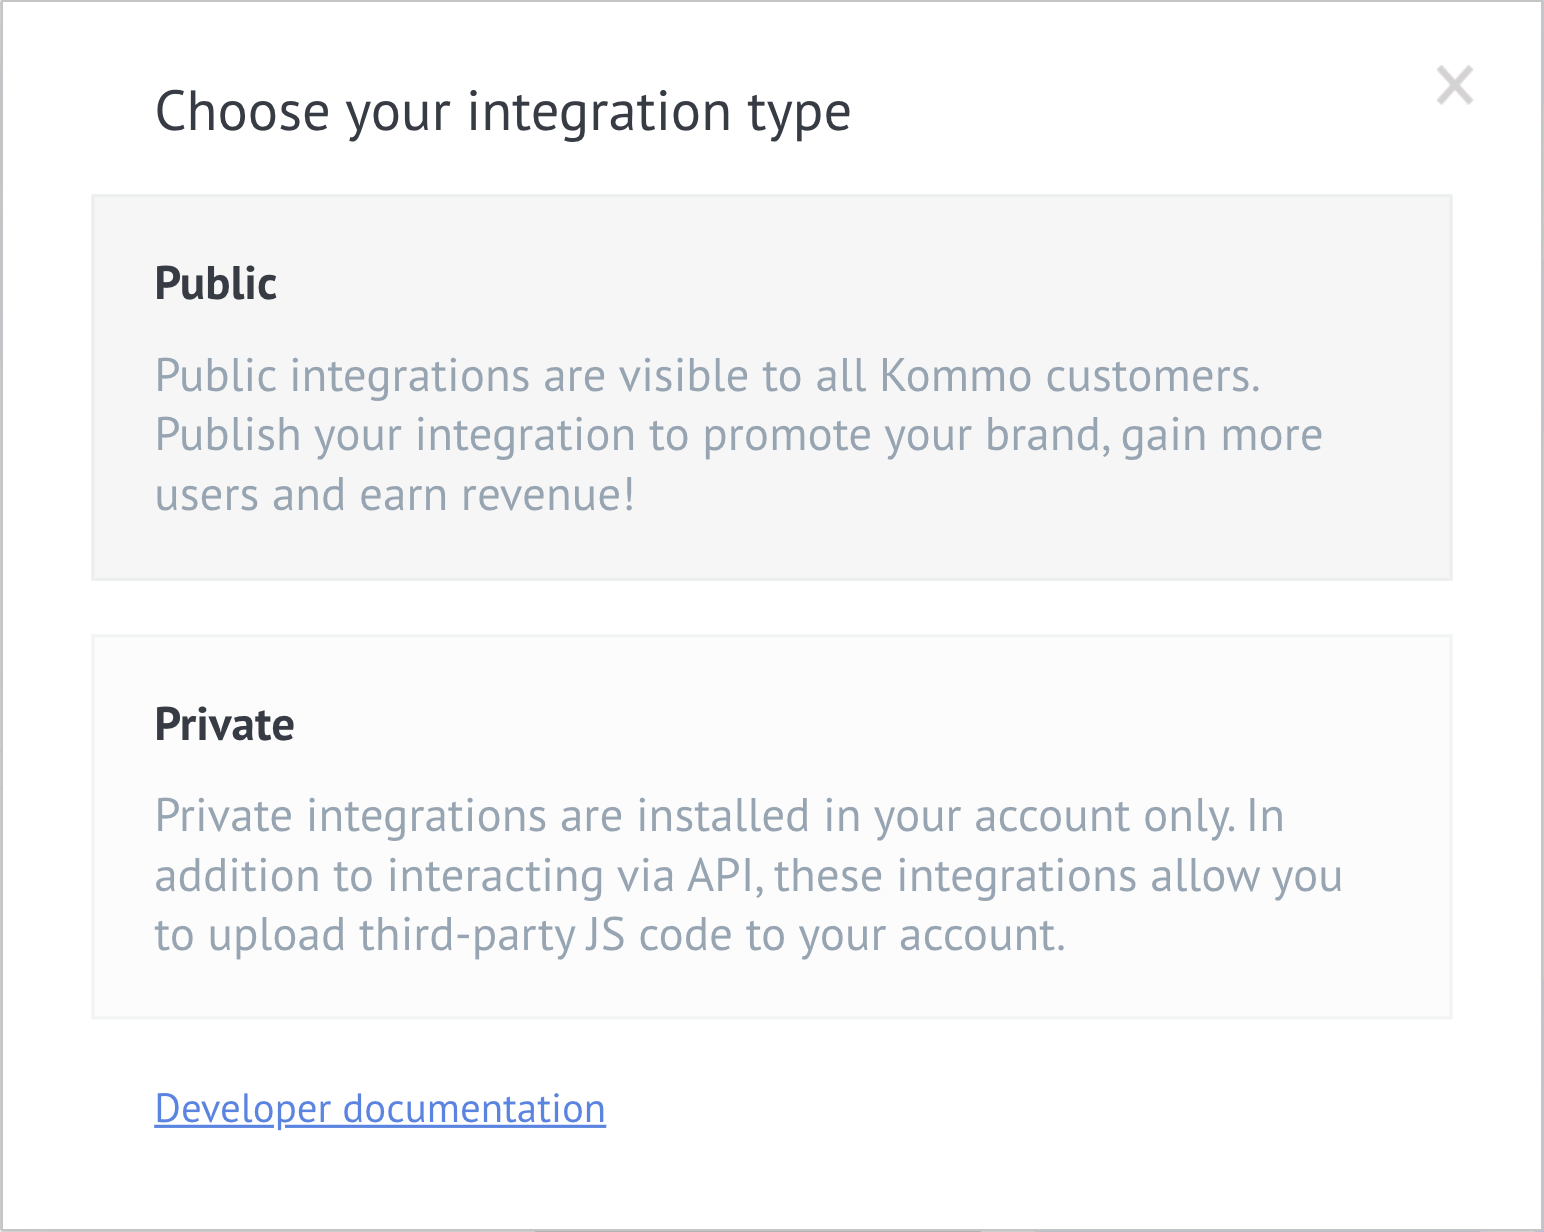
Note that at this point, you can quickly refer to the API documentation section to check your integration against our requirements before creating it.
Settings. Stage 1
In a technical account, when creating a public integration, you will notice that the integration interfaces are more complex. You will have more ability for versioning, multilingualism, etc.
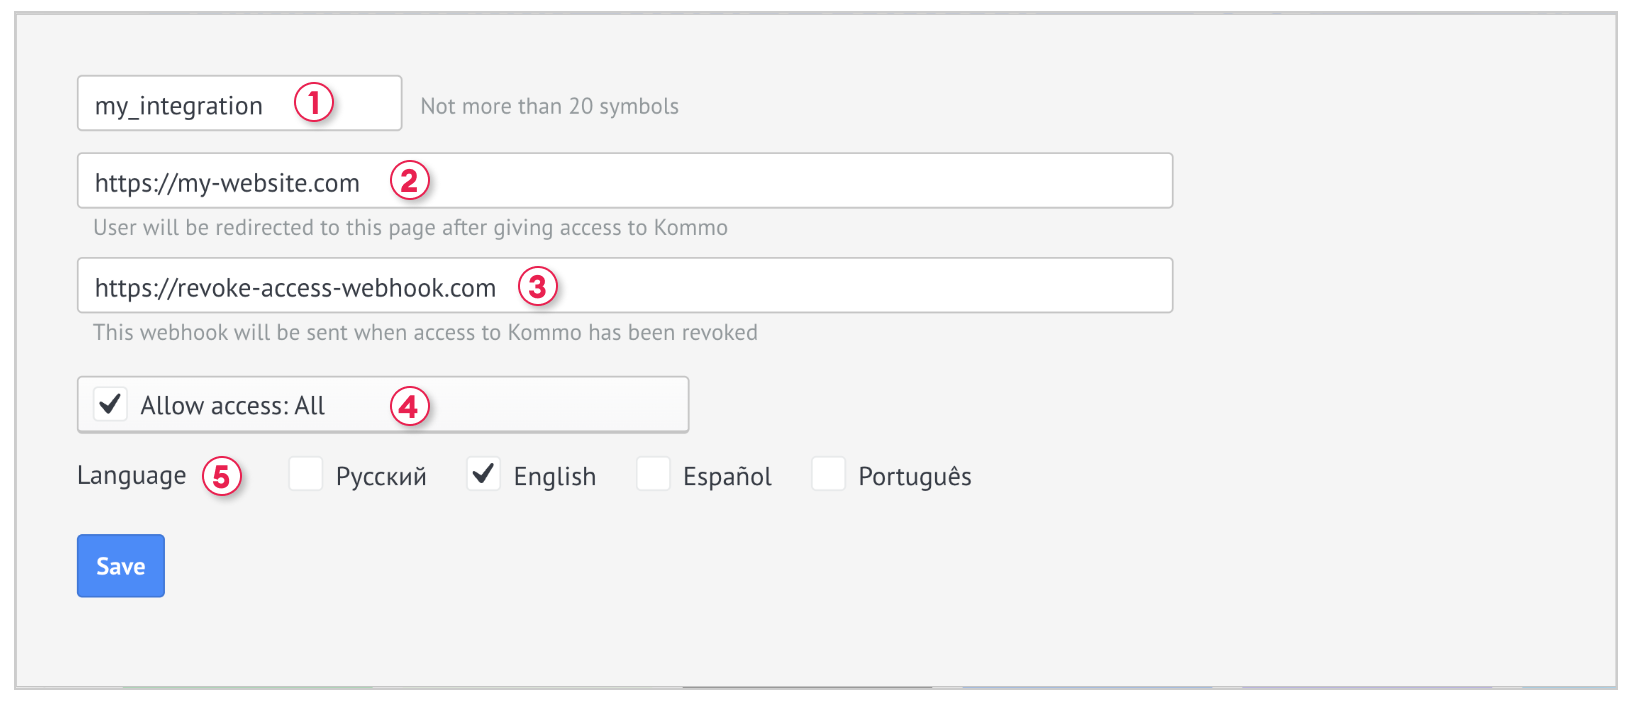
On the first stage you must fill in the fields:
1. Widget Code
To specify the widget code, use the following rules:
- Use Latin letters
- The widget code must not start with an uppercase letter
- Numbers can be used, but not as the first character of your widget code
- The only special character allowed is _ (underscore) but you shouldn't start your widget code with it
2. Redirect URL
The redirect URL is a link to your site that will handle the work with keys. It is important that the domain is protected
by an SSL certificate if you plan to use integration in more than one account. We also check the availability of the domain from time to time to make sure the integration works.
3. Access Revoked (optional)
This is the link for a webhook regarding disabling the integration. A GET request will be sent to this address when the user disables the integration. The request will contain two parameters: account_id and client_id.
4. Allow Access
Granting access is the minimum set of necessary permissions for the integration to work. You can choose several options:
- Access to account data
- Notification center
- Access to files
- Deleting files
5. Language
Choose the languages needed for your integration.
In this section you can select any languages you need for your widget. You can delete or add extra languages later.
Then don't forget to click Save!
Settings. Stage 2
Then you have to fill in the integration information for all the languages you have chosen.
To validate the Request Review button in the future, you need to ensure that ALL fields are filled out correctly, as all fields are mandatory.
Additionally, you can find information in the article Public integration checklist.
General
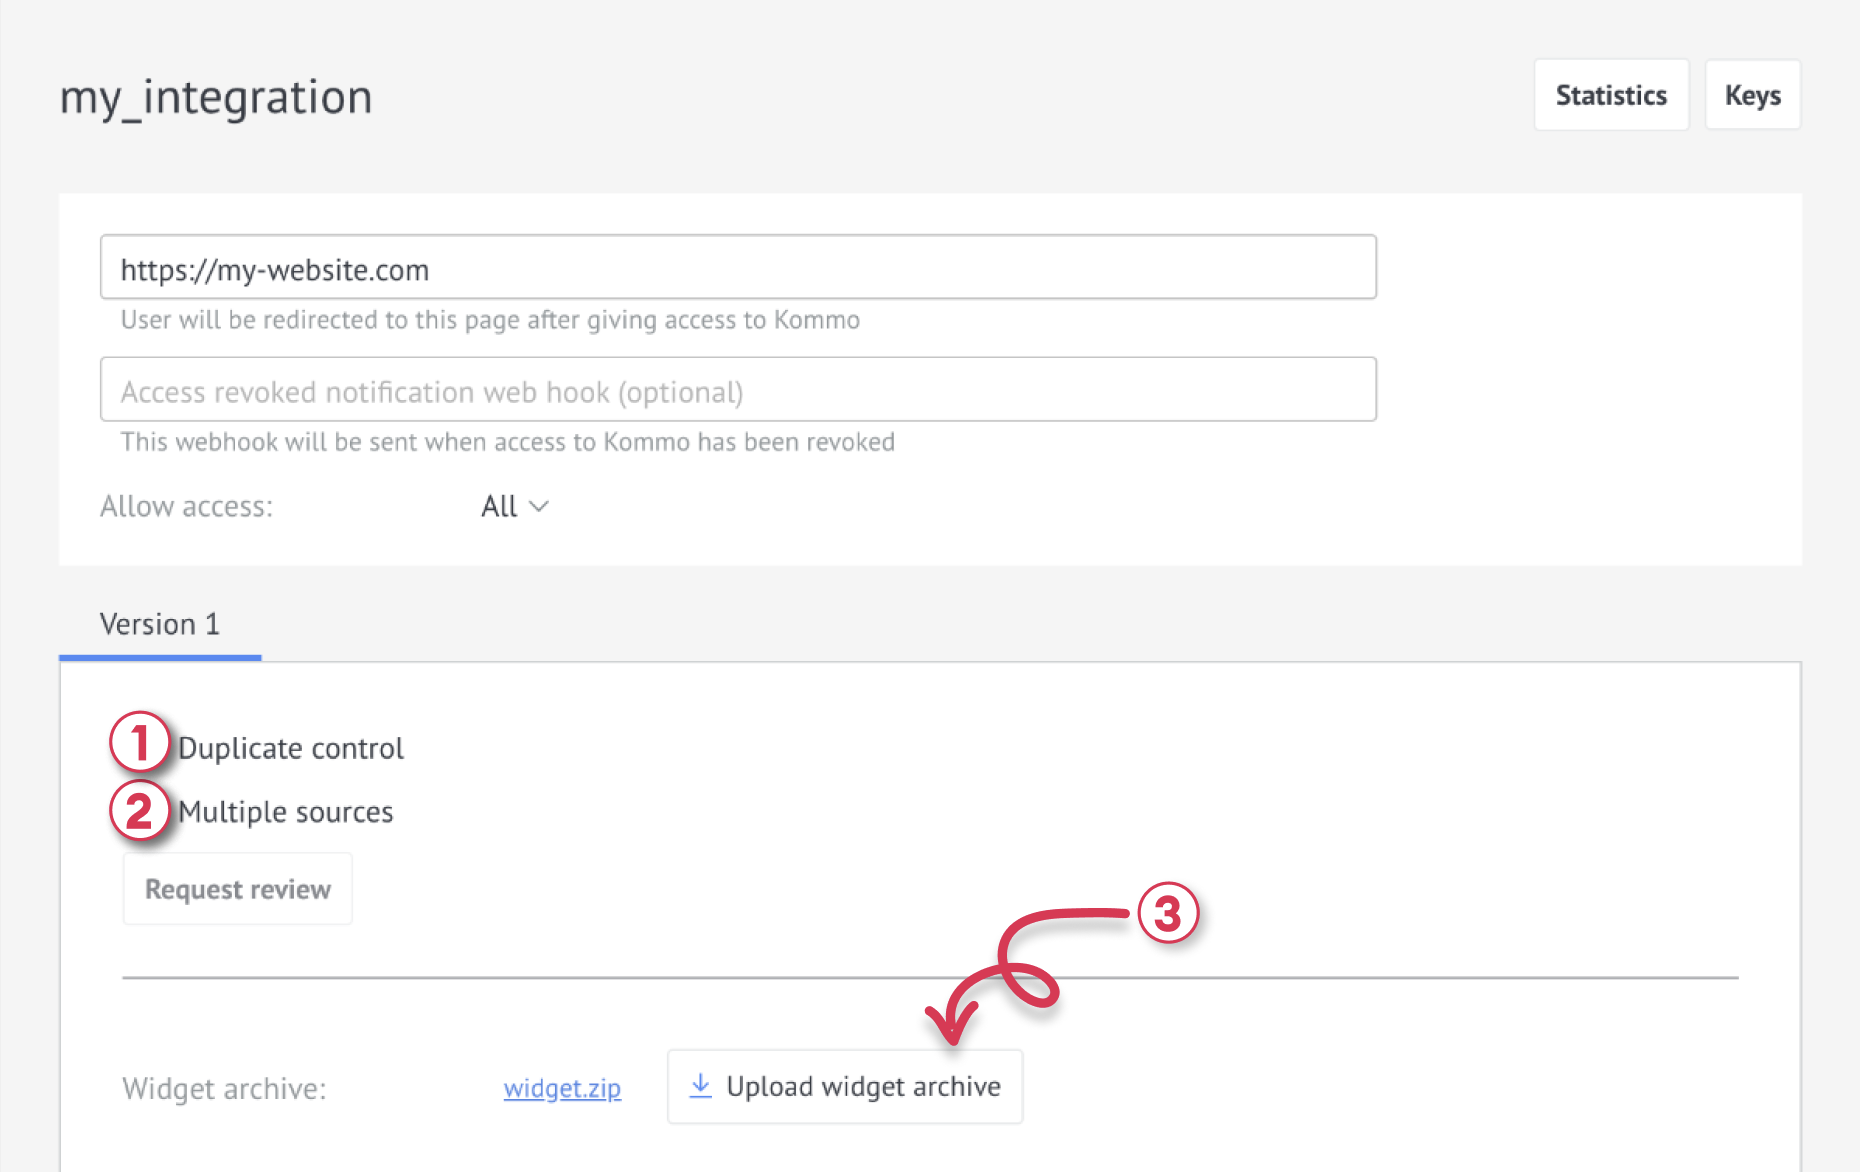
- Duplicate Control
Check this box if your integration supports duplicate control.
- Multiple Sources
Check this box if your integration manages the sources itself via the Sources API. If this checkbox is selected, Kommo will not create sources by default (it will have to create all the sources it requires).
- Upload widget archive
You need to upload the widget archive. Press the Upload Widget Archive button. You can find more information about archive requirements in the Widget articles.
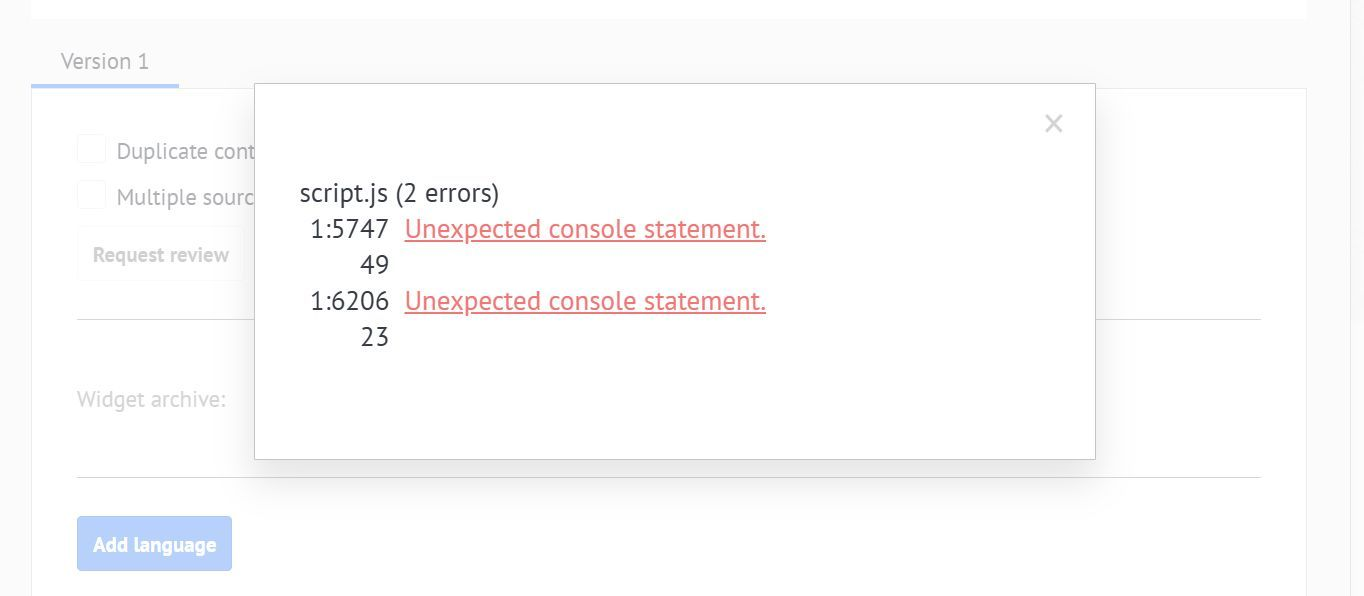
Your archive is automatically validated against the requirements outlined in the Public Integration Checklist article. If any issues are found, you will receive a 400 Bad Request response containing a list of errors along with their locations.
- Integration language
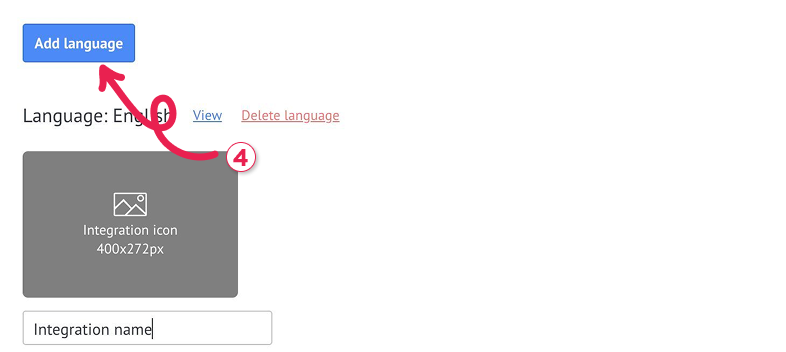
You can easily add languages to your integration directly from your technical account. Simply click the Add Language button and select the one you need in the dropdown menu. If you no longer require certain languages, you can remove them as well.
Please keep in mind that the only language cannot be deleted.
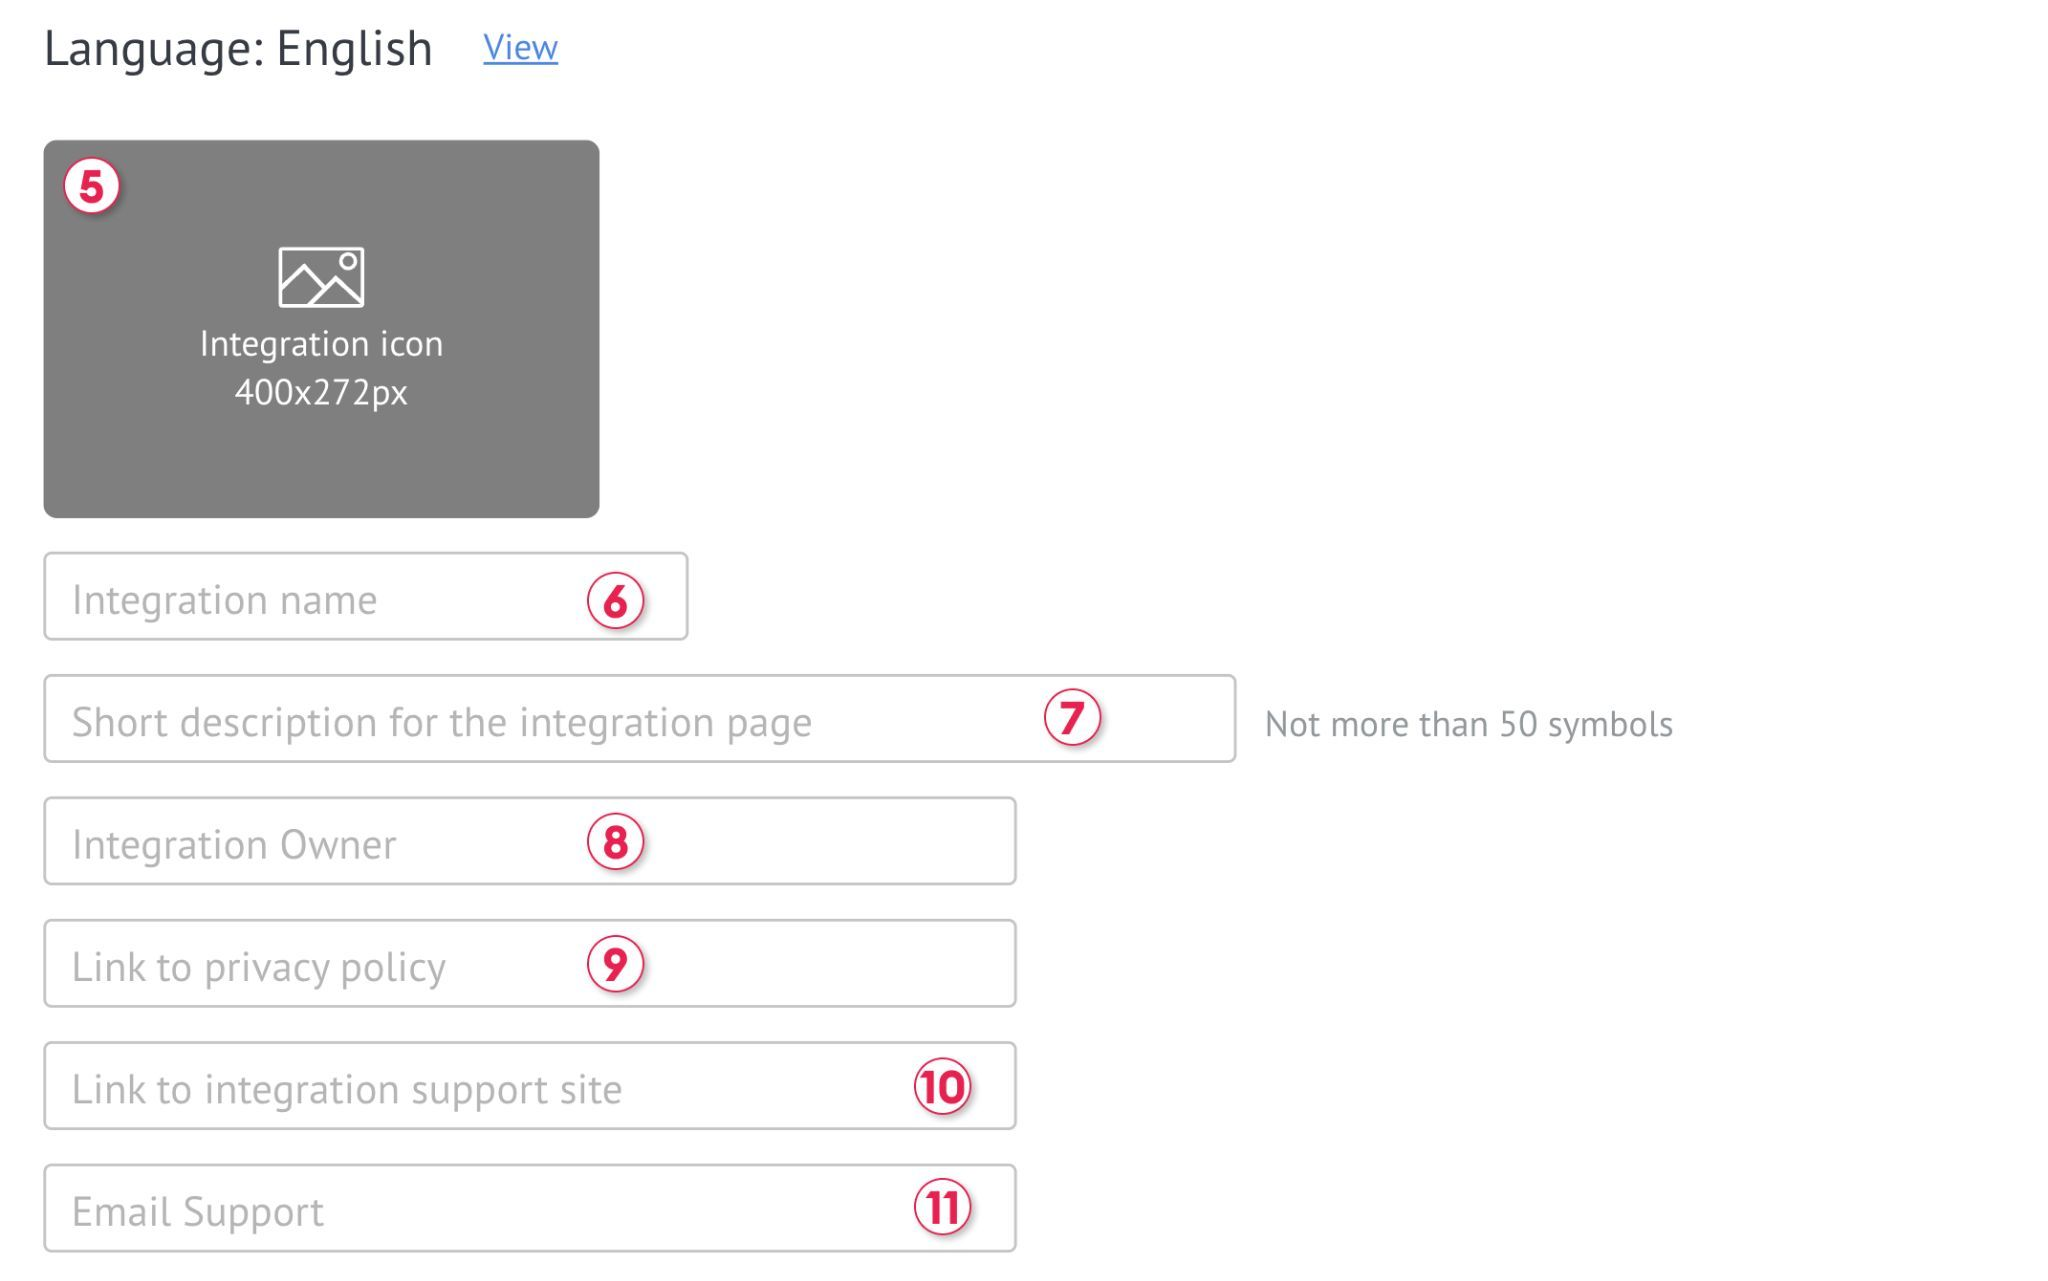
- Integration Icon
Ensure the image size is 400 x 272 px. To change the logo, simply click on the image and replace it with a file from your device.
- Integration Name
Provide the name of the integration.
- Short Description
Provide a short description for the integration page. The maximum number of characters is 50.
- Integration Owner
Please verify the company name (it will be used for the privacy policy section)
- Link to Privacy Policy
Provide a link to the integration's privacy policy.
- Link to Integration Support Site
Provide a link to the support site for the integration.
- Email Support
Provide an email address for support.
View Before Installation
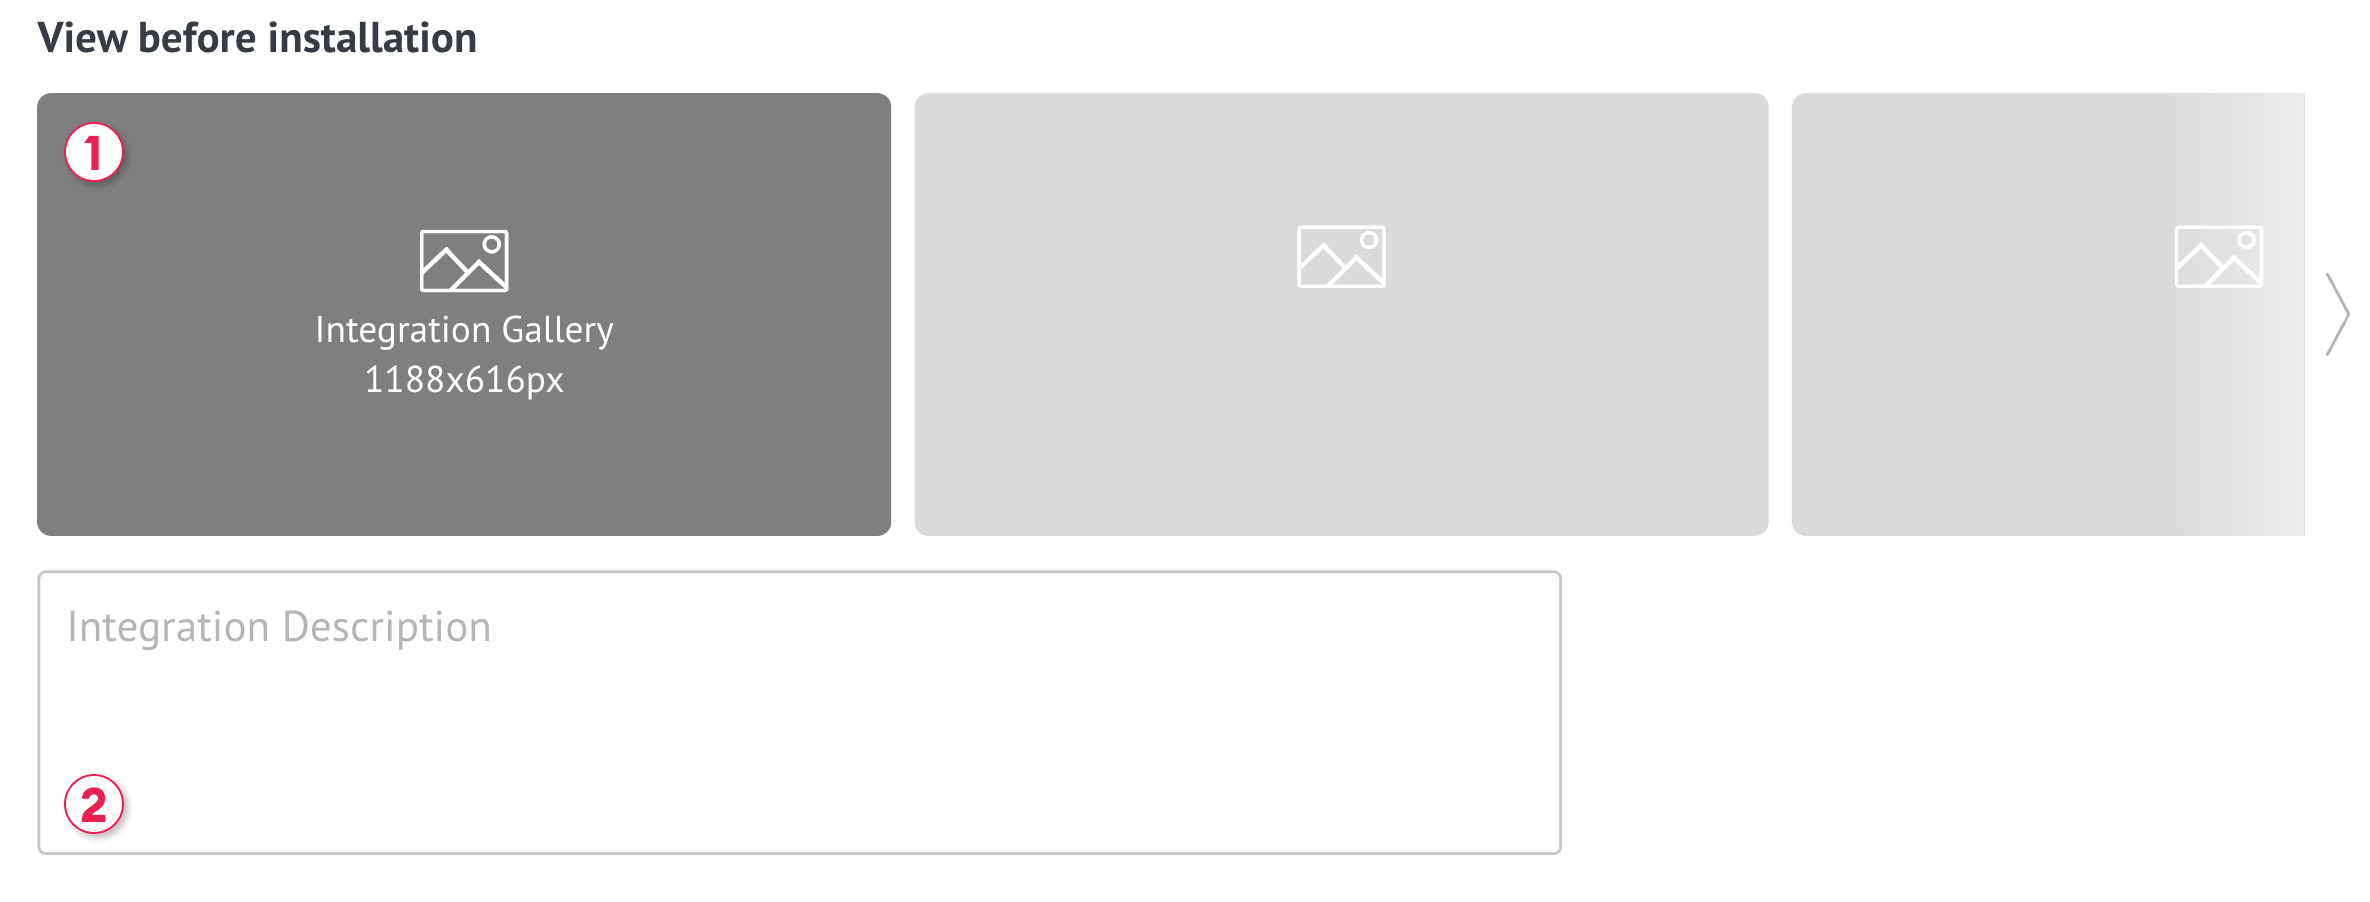
- Integration Gallery
Ensure the image size is 1188 x 616 px. The tour images can be deleted or replaced. To do this, hover over the image and select the appropriate option. To add an image, click on the default element Integration Gallery and select the image from your device.
The order of adding images will not match the order in the integration window. This way your first added image will appear last in the gallery.
- Integration Description
Provide a description of the integration.
View After Installation
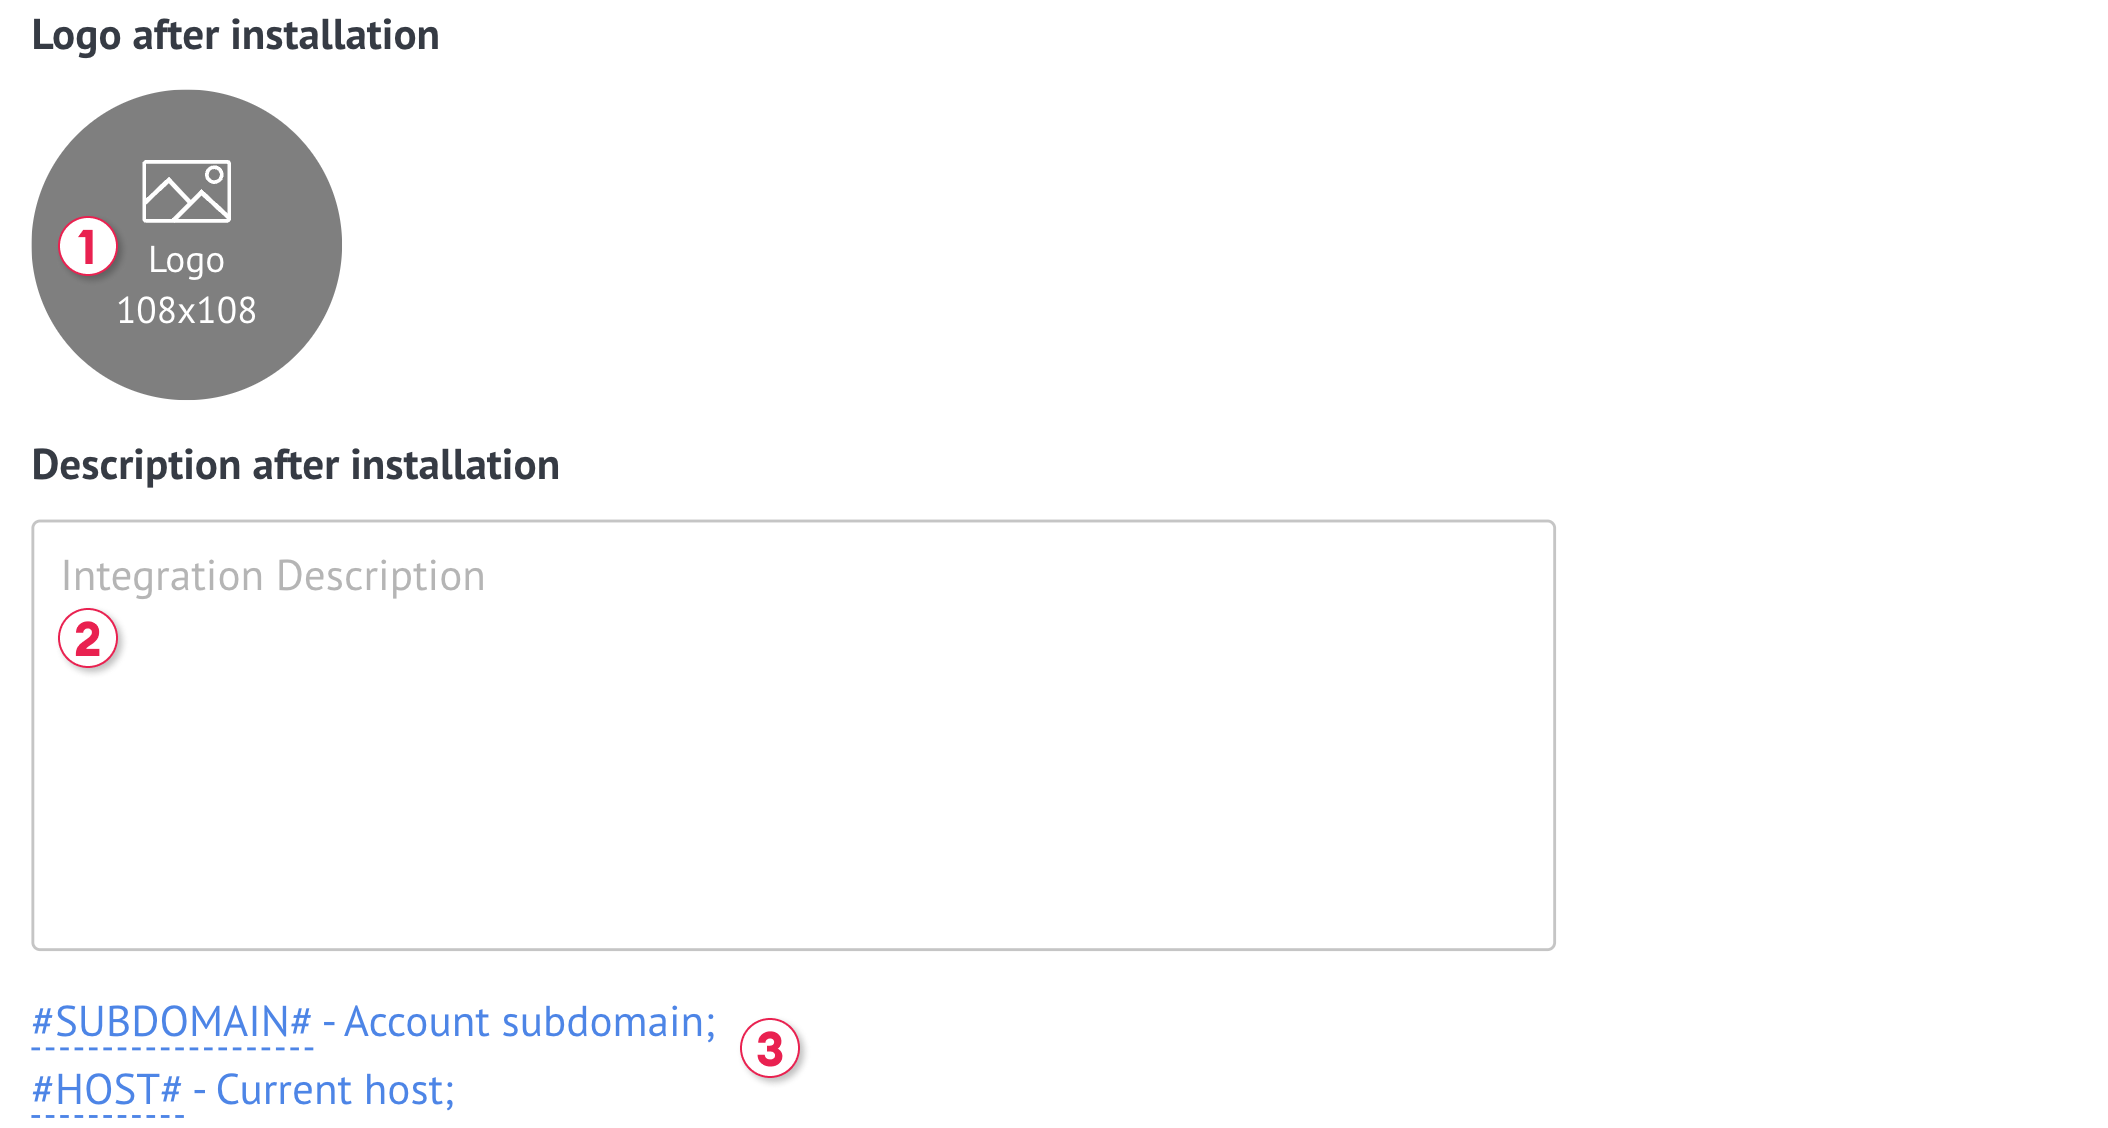
- Logo After Installation
Ensure the image size is 108 x 108 px. To change the logo, simply click on the image and replace it with a file from your device.
- Description After Installation
Provide a description for the view after the installation.
- Tags (Optional)
You can use the suggested tags to personalize your description for each user.
You add a tag to the description after installation in any desired place; just click on it, and the tag will insert the customer’s information into the description in their account.
For example, you can use the tag #ACCOUNT_ID# to specify where you want this information to be used, ensuring your widget is correctly installed.
Keys
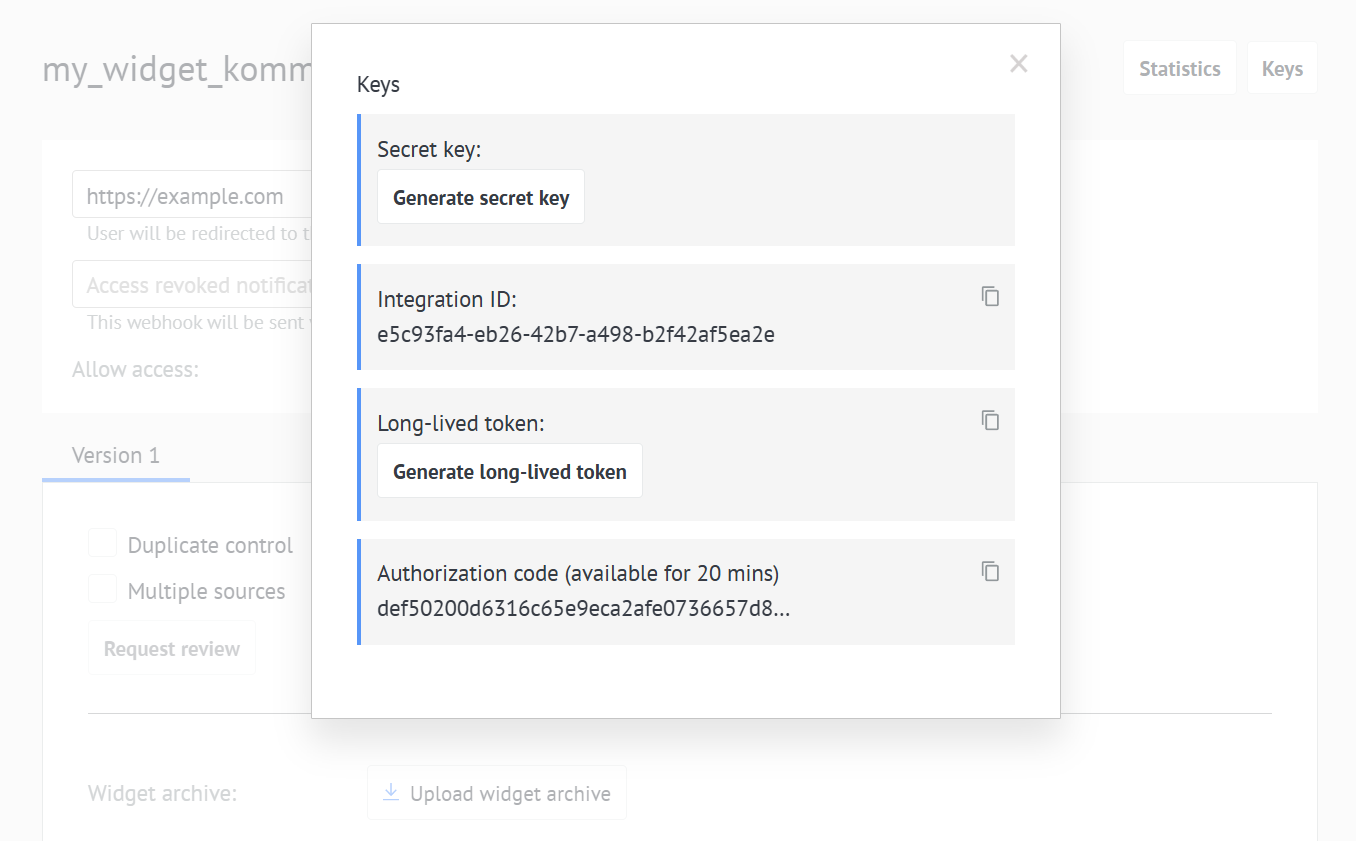
When going to the Keys tab in the Widget window, you can see the Authorization code and Long-lived token which you can use in the authorization process, Secret key (is hidden by default) and Integration ID will be used independently from the account in which it will be installed.
Statistics
In your technical account, you can also view statistics on installs and uninstalls of your integration by accounts. To access the statistics, click on the Statistics button to the left of the Keys button in the integration management modal window.
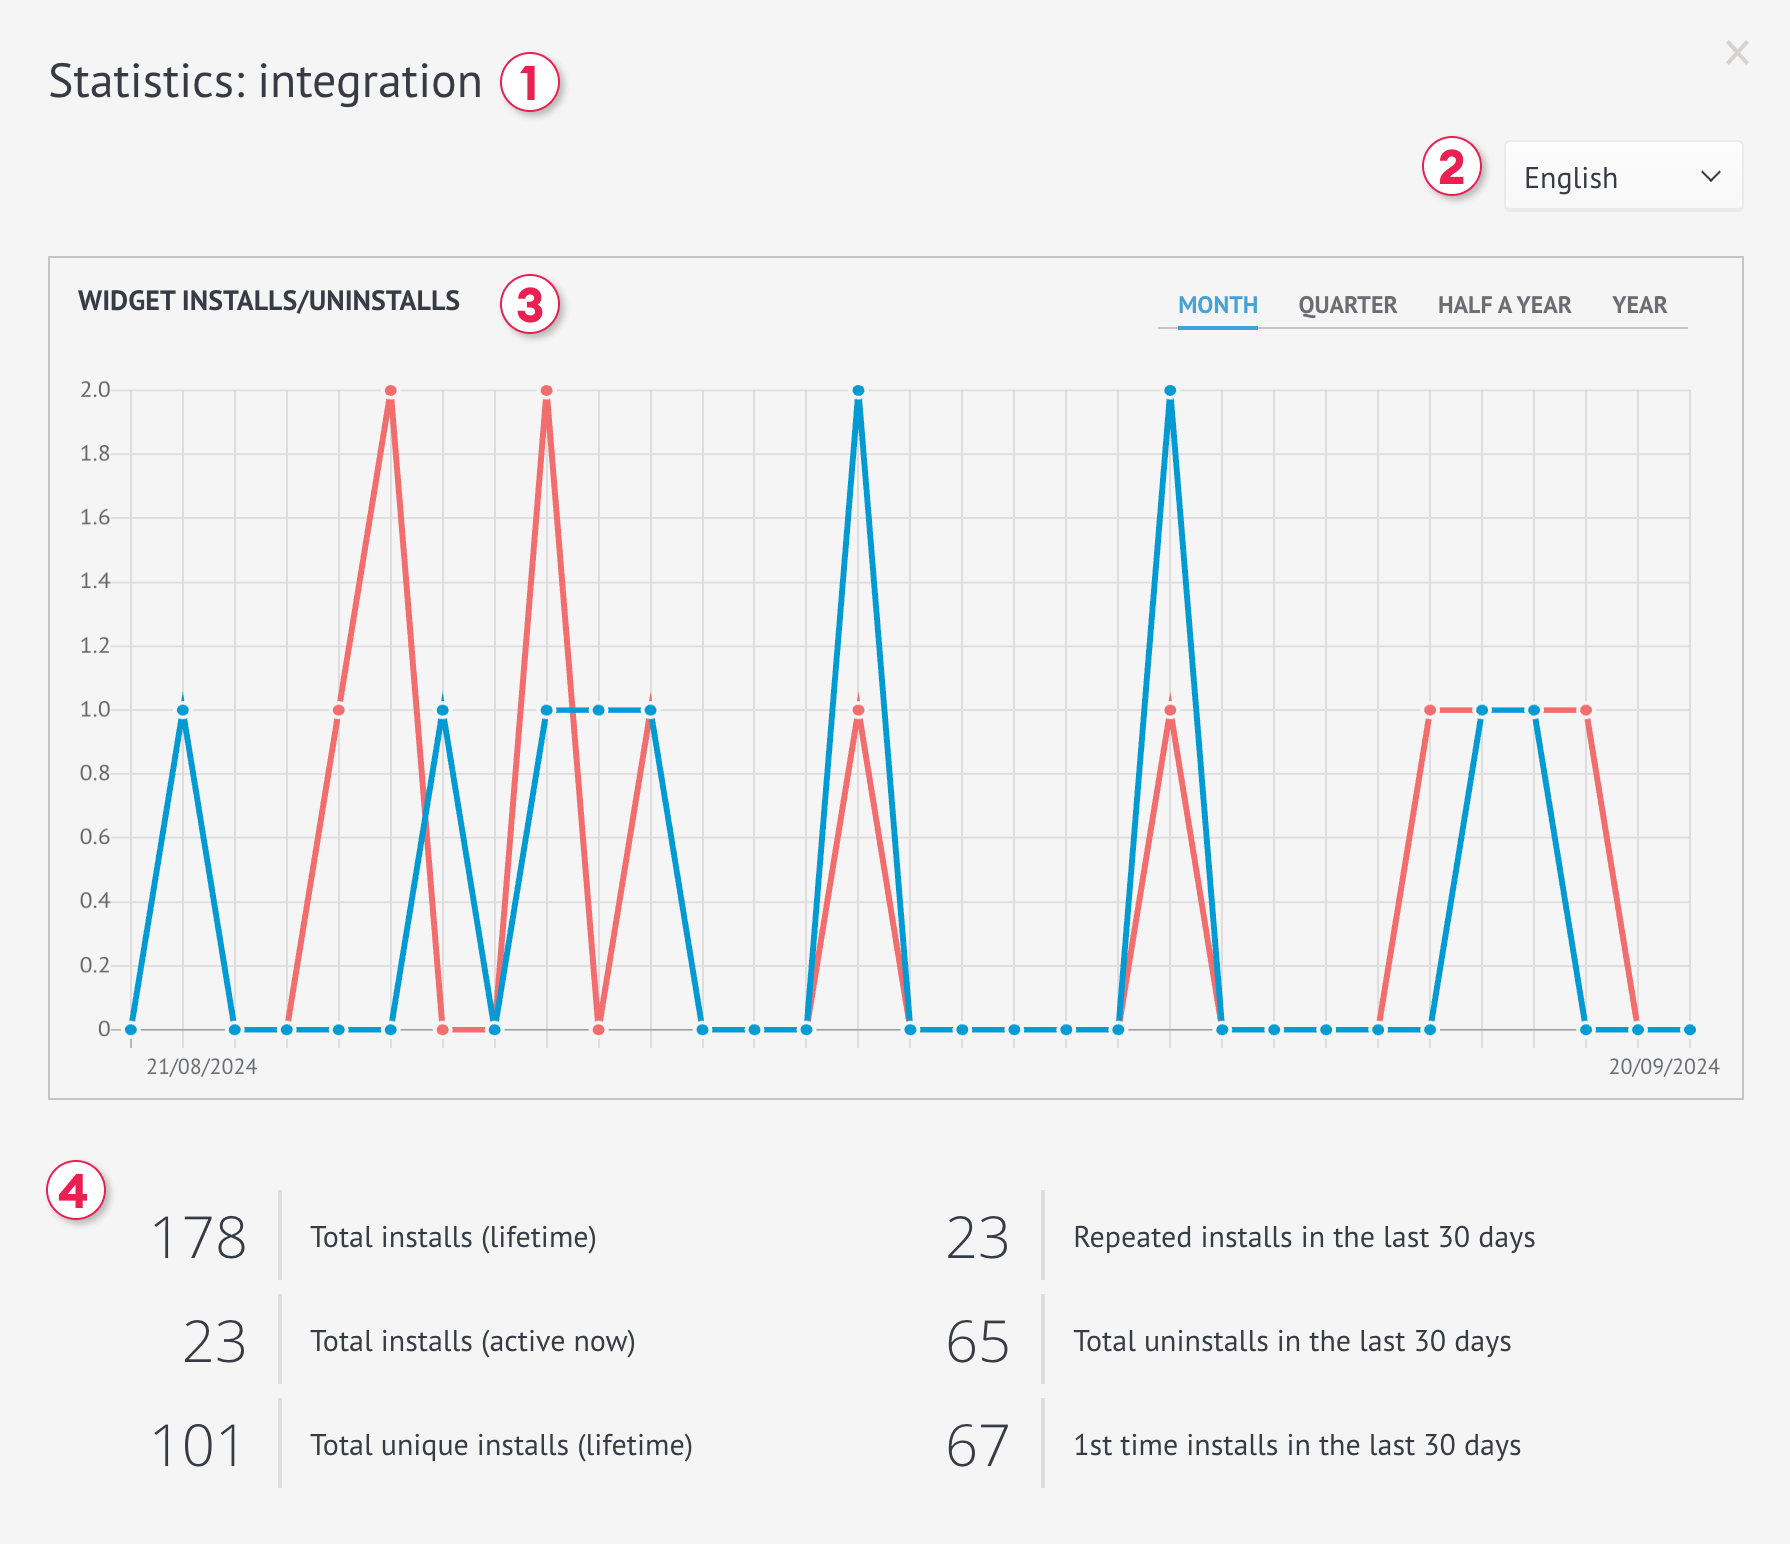
In the opened statistics window, you will have access to the following information if you are an administrator of the technical account:
- Widget code of the integration you are viewing.
- Language
A dropdown will display all languages available for the integration. Each language has its own statistics, as it accounts for installations for the Marketplace in each language separately.
- Chart
A graphical representation of the dynamics of installs and uninstalls by clients over the selected period. Installations are indicated in blue, and uninstalls in red. The horizontal axis shows the reporting period, while the vertical axis shows the number of installations.
- Metrics (quantitative display of installs)
Test your integration
When making changes to the integration, you can immediately test them in the same account.
To test the integration, you need to install it from the Marketplace and ensure that it is displayed in the Installed section.
Then, you can check the functionality of the integration as it would be used by the user.
Add a new version
If you want to make changes in the version after moderation (approval/rejection/or you called the
version off), you can create a new version and make changes in it. To do this, click the +Add Version
button in the integration modal window.

You can check the version that appears in the Marketplace by opening the logo in a separate tab and looking at the number in the link after the widget code, or by using Dev Tools.
https://subdomain.kommo.com/upl/my_integration/1/widget/images/en/logo_main.png?version=1
Delete unpublished version
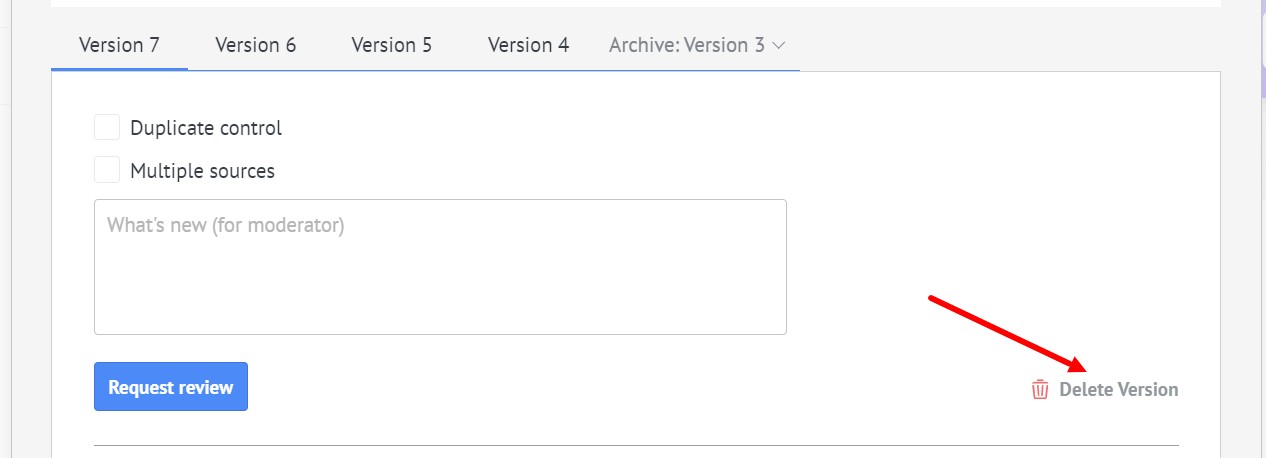
Once the integration has been submitted for moderation or published, it can't be completely deleted. You can only
delete the new unpublished version and add it again. To do this, use the Delete Version button located to the right of the text field.
My integration in the Marketplace
You also can see a tab called My submissions at the top of the integrations section, in which you can see the public integration you have created.
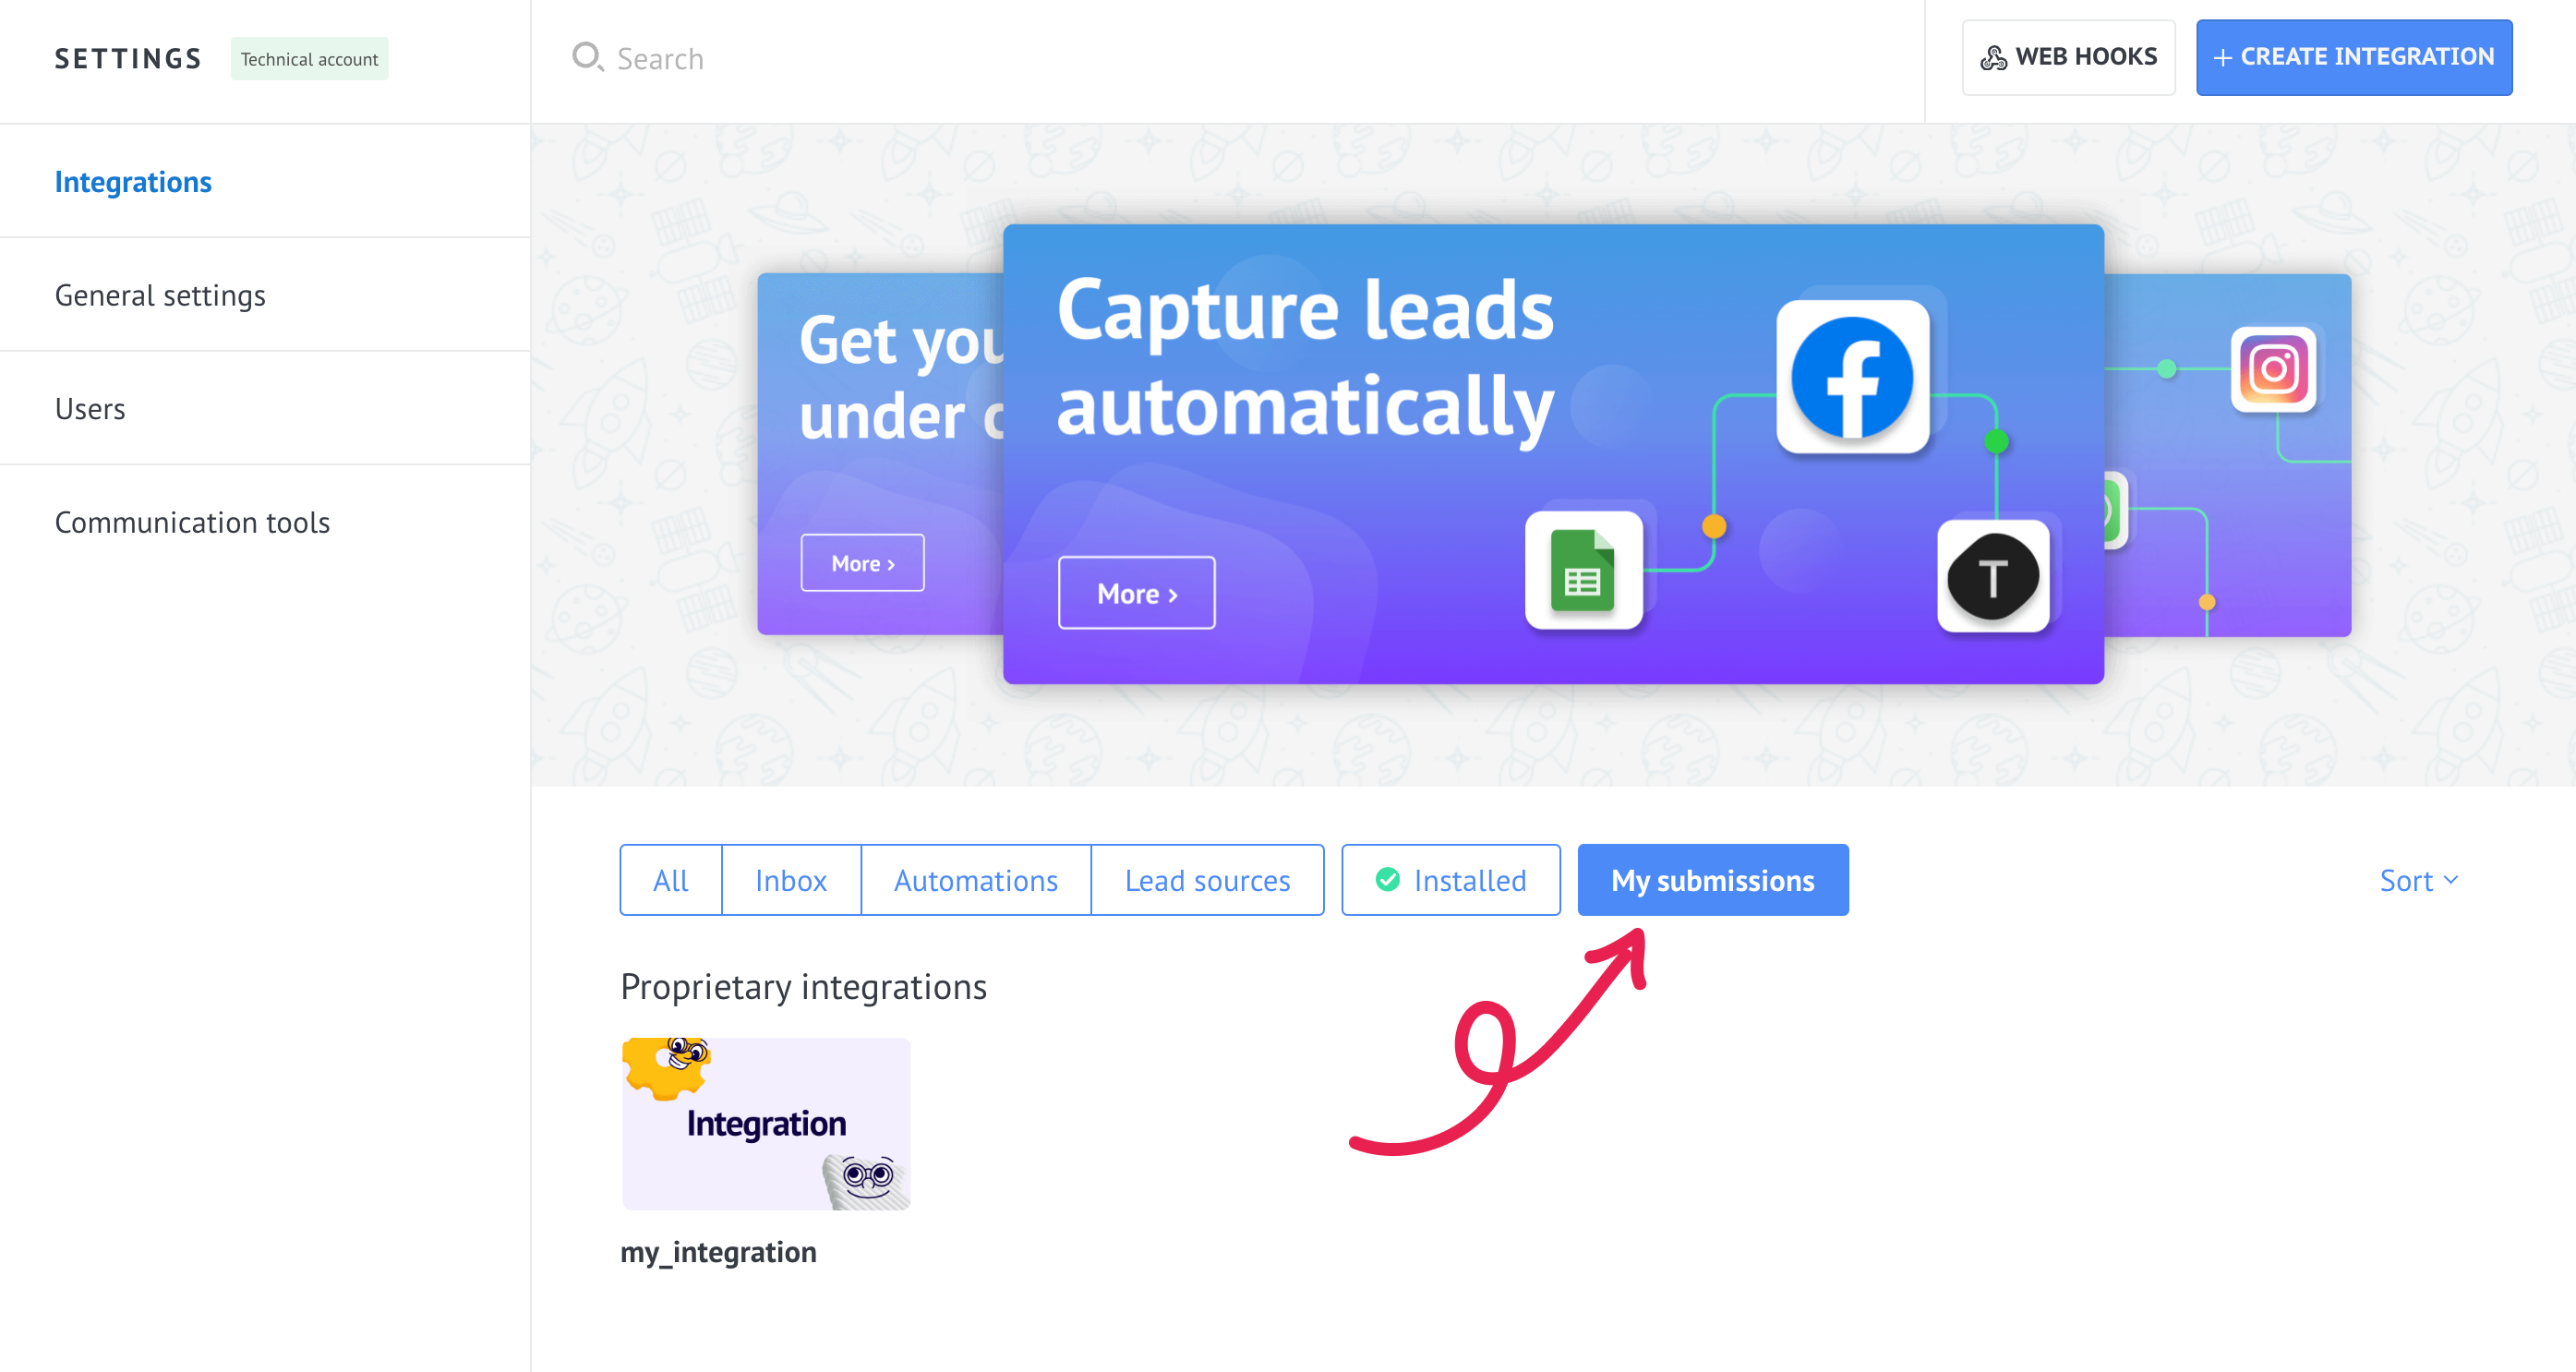
In the technical account, your widget is displayed in two states:
- As an integration management tool in the My Submissions section, where the developer can make changes
- As a finished integration that the user sees in the Marketplace
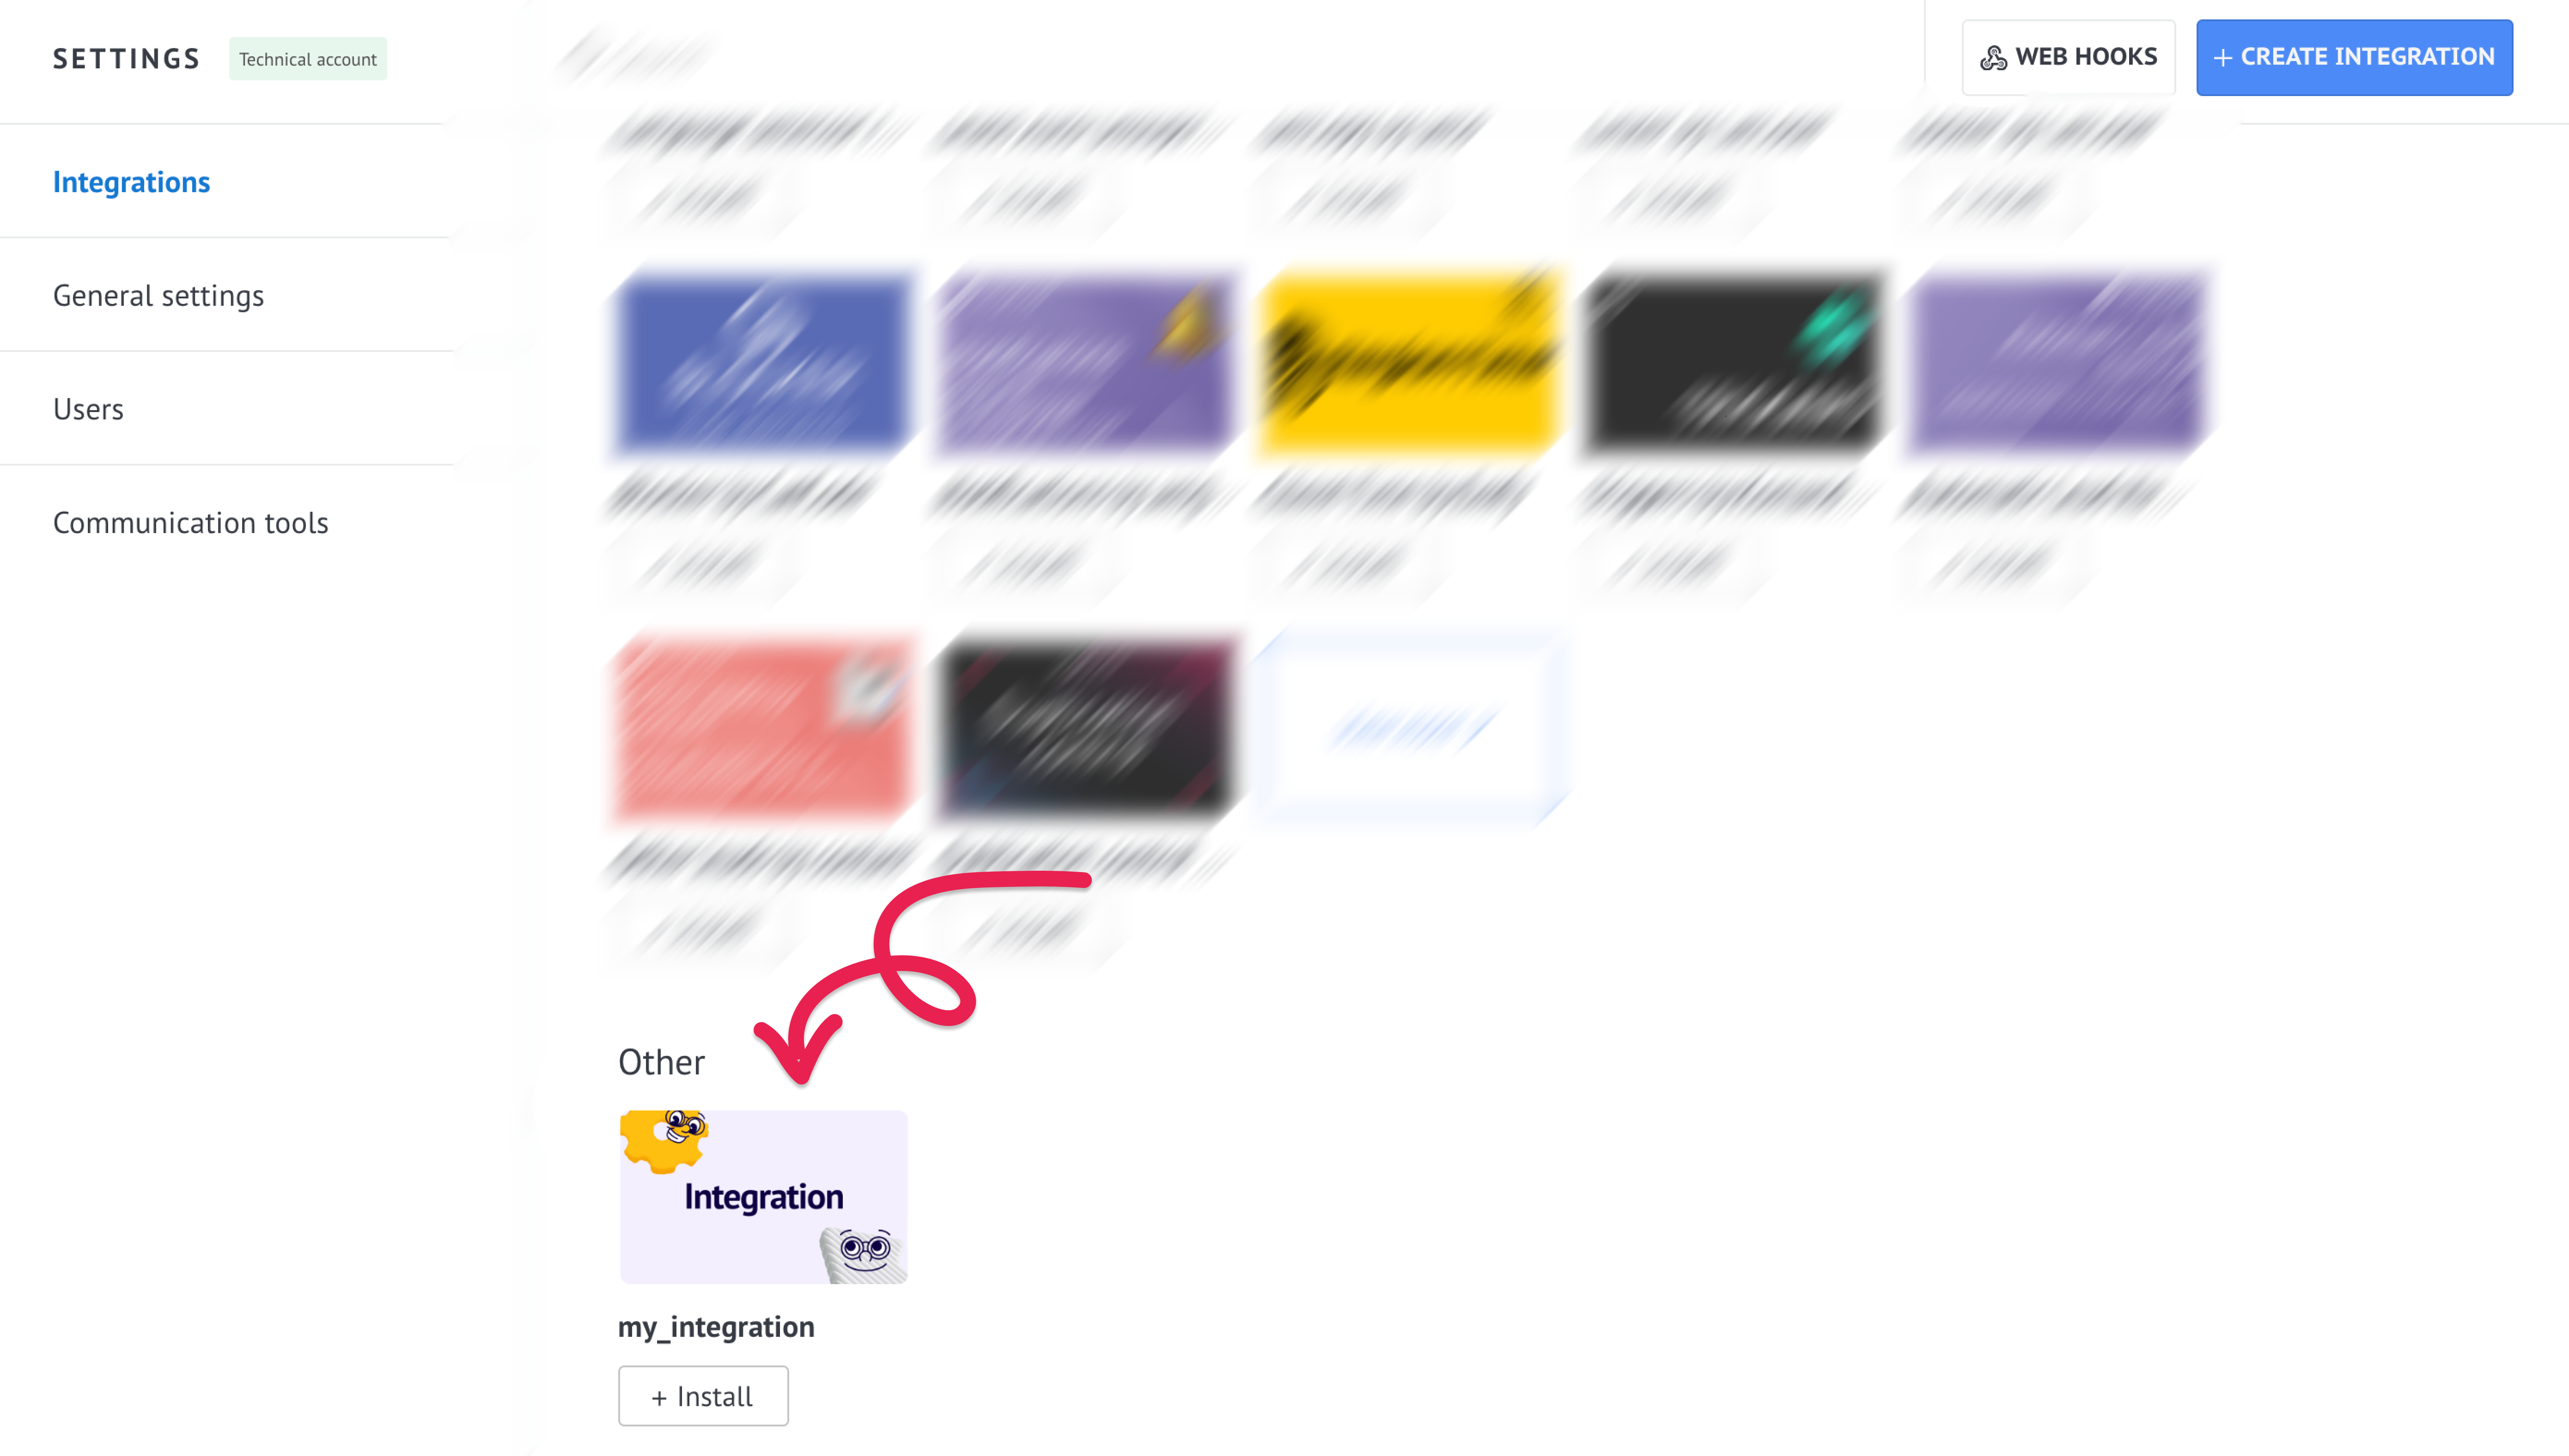
If the integration hasn't been previously published and a category has not yet been selected, it will be displayed to the user in the Marketplace under the Other category.
It can also be placed in the category selected during publishing and in the Installed section.
Updated 2 months ago