
Authorization and configuring
Kommo authorization
Since our integration uses OAuth 2.0 for authorization, after completing the setup as described in our step-by-step guide, an authorization code will be generated. This code must then be exchanged for a pair of access and refresh tokens. These tokens should be securely stored in your database, along with their expiration time.
Please note that a single user may install the integration on multiple accounts. Integrators must ensure strict data isolation between these accounts to prevent any data leakage or unauthorized access across accounts belonging to the same user.
Once the integration is installed, the settings window will appear, with fields to be filled by the administrator of the Kommo account. Kommo will only consider your integration configured successfully once the settings are saved correctly. This is implemented in the UI/UX, by calling the onSave callback function when the administrator chooses to save the integration settings. The function should return true once the widget is successfully configured, false otherwise.
function CustomWidget() {
  const self = this;

  self.clickSaveButton = function () {
    /*
     * This function defines the actions performed
     * when the save button is clicked.
     */
    const $save_button = $(document).find(".js-widget-save");

    $save_button.click();
  };

  /**
   * An object containing widget-specific callbacks.
   * Get more info about callbacks here https://developers.kommo.com/docs/script-js
   */
  this.callbacks = {
    /**
     * Callback that is triggered when the ".js-widget-save" button is clicked.
     */
    onSave: (widgetConfiguration) => {
      const { active, fields } = widgetConfiguration;

      /**
       * Here you can specify a condition that determines
       * whether the widget is ready for configuration.
       */
      const isWidgetConfiguredByCRM = active.toLowerCase() === "y";

      /**
       * The manifest.json specifies the names of the fields displayed in the settings.
       * These names are the keys of the "fields" object.
       * The values of these keys correspond to the input values
       * at the moment the onSave callback is triggered.
       */
      const { login, password } = fields;

      const areFieldsFilled = login && password;

      const isWidgetReady = isWidgetConfiguredByCRM && areFieldsFilled;

      if (isWidgetReady) {
        alert("Your integration settings have been successfully saved!");

        /**
         * Return true if the widget is ready.
         */
        return true;
      }

      alert("Kommo could not register your widget.");

      /**
       * Otherwise, return false.
       */
      return false;
    },
  };

  return this;
}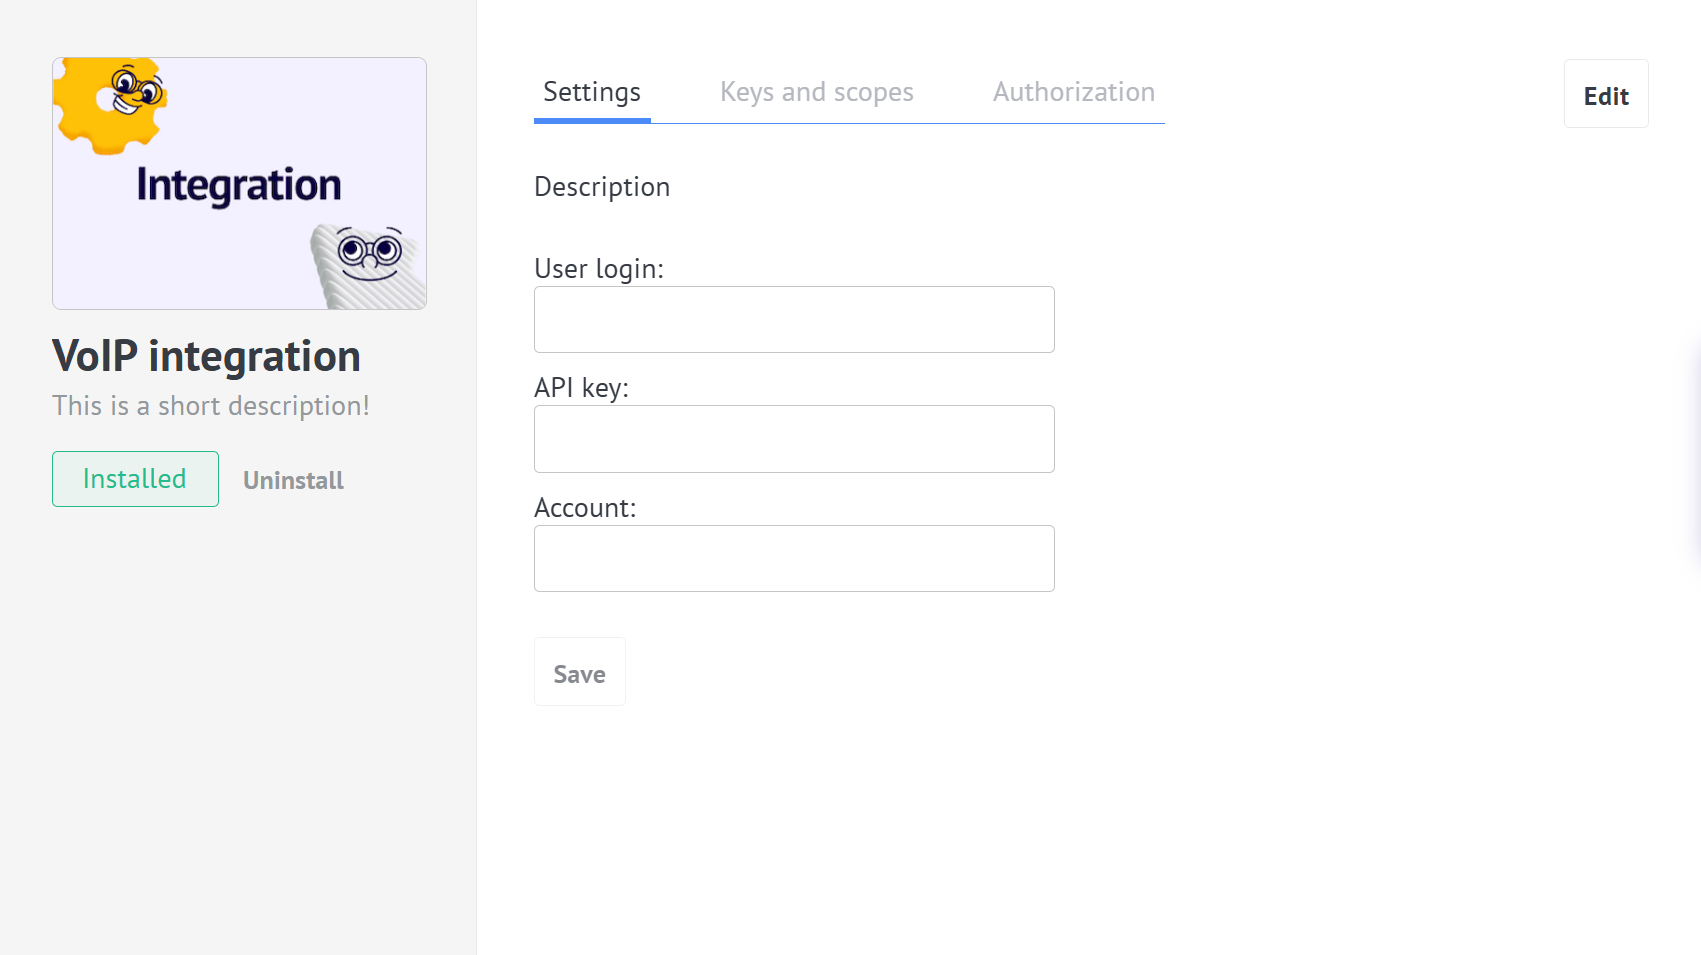
An example of an integration settings and configuration section
Please keep in mind not to use the account subdomain as the primary key for your settings since it could be changed. We also recommend not using the account ID either for this purpose. A better decision would be using an auto-increment ID field as the primary key, and the account ID and subdomain will simply be int and string properties accordingly. For more information on the configuration, please review the widget settings article.
VoIP service authorization
After the user installs the integration from Kommo Marketplace, the integration should show a modal window for settings where the user can perform some actions, such as providing the credentials to access the VoIP service. These credentials are known only to the administrator of the VoIP account. Another option is to use OAuth 2.0 for authorization.
It is necessary to save the authorization information for further calls to the service API. The widget can be considered active from this point.
Integration configuration
The call handling configuration allows you to define how the system responds to different types of calls and user actions. The available settings may include enabling the ringing sound, providing call feedback, automatically opening the client card when a call is received, and allowing users to rate the call quality.
Administrators can also configure what happens in various call scenarios, such as calls from known or unknown numbers, and calls that were answered or missed. This flexibility allows the system to adapt to different communication workflows and business processes.
When a call is received from an unknown number, the system can automatically create a new contact and lead, or log the call as an incoming lead. Managers can be given the option to manually accept such leads, or the leads can be automatically accepted once the call is answered.
For calls received from known contacts, the configuration may include automatically creating a lead if no active lead exists, and adding the phone number to the note if the contact has multiple numbers associated with it.
When a manager misses a call, the system can automatically create a follow-up task, set the due time for it, link the task to the relevant lead, and assign a responsible user to ensure further action.
For outgoing calls made to new numbers, the configuration may include automatically creating a new contact and a new lead, ensuring that all interactions are properly recorded and tracked within the system.
Data representation
An example of the information you can record in your database:
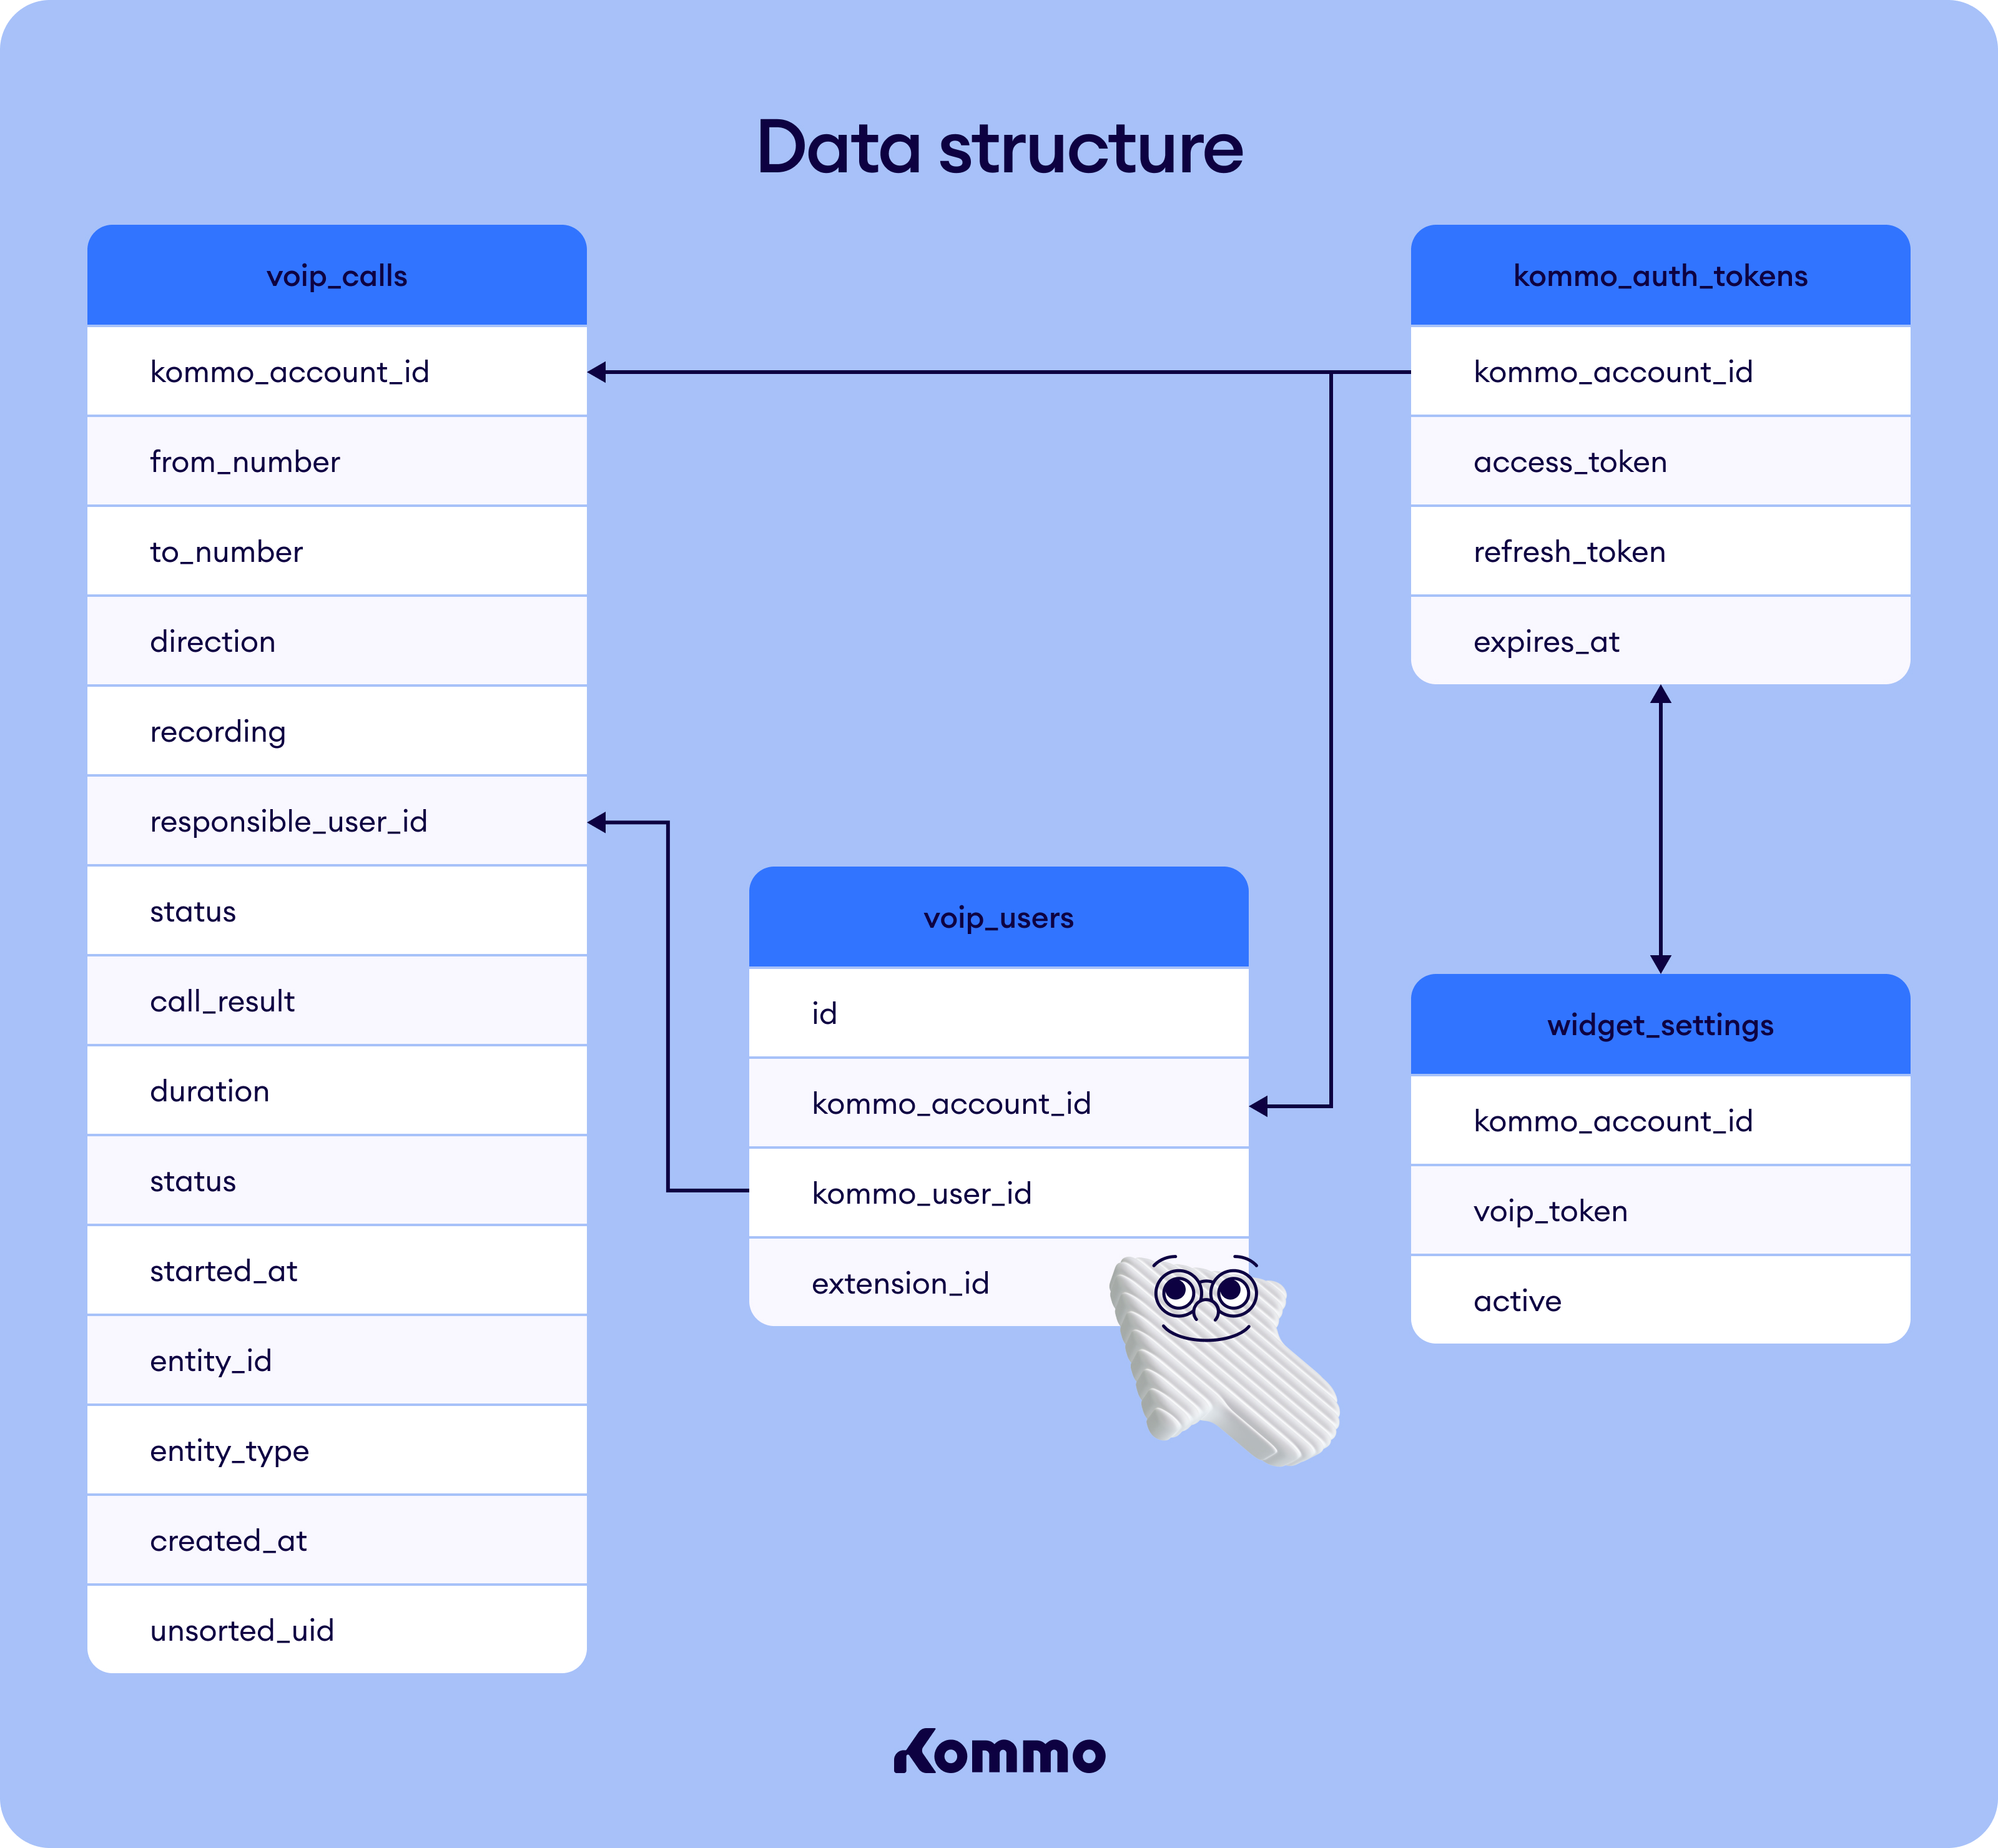
kommo_auth_tokens
kommo_auth_tokens| Field | Description |
|---|---|
| kommo_account_id | Account ID in which the integration is installed |
| access_token | Access token of the integration |
| refresh_token | Refresh token of the integration |
| expires_at | Expiration date for the tokens |
voip_users
voip_users| Field | Description |
|---|---|
| id | Primary key |
| kommo_account_id | Account ID in which the integration is installed |
| kommo_user_id | Kommo user to which an extension is given |
| extension_id | The extension number provided by VoIP service |
voip_calls
voip_calls| Field | Description |
|---|---|
| call_id | Call ID |
| kommo_account_id | Kommo account ID |
| from_number | Caller number |
| to_number | Called number |
| direction | Incoming/outgoing call |
| recording | Link to the call recording |
| responsible_user_id | Kommo user ID responsible for the call |
| status | Call status |
| call_result | Call result note added by the manager |
| duration | Call duration |
| status | Call delivery status |
| started_at | Call start time |
| entity_id | The entity ID to which the call is connected |
| entity_type | The entity type to which the call is connected |
| created_at | Time of registering the call |
| unsorted_uid | ID of the incoming lead if exists |
widget_settings
widget_settings| Field | Description |
|---|---|
| kommo_account_id | The account ID in which the integration is installed |
| voip_token | The keys to accessing the VoIP service |
| active | A boolean to detect the widget activity status |
Entities
While programming, we need to declare some entities:
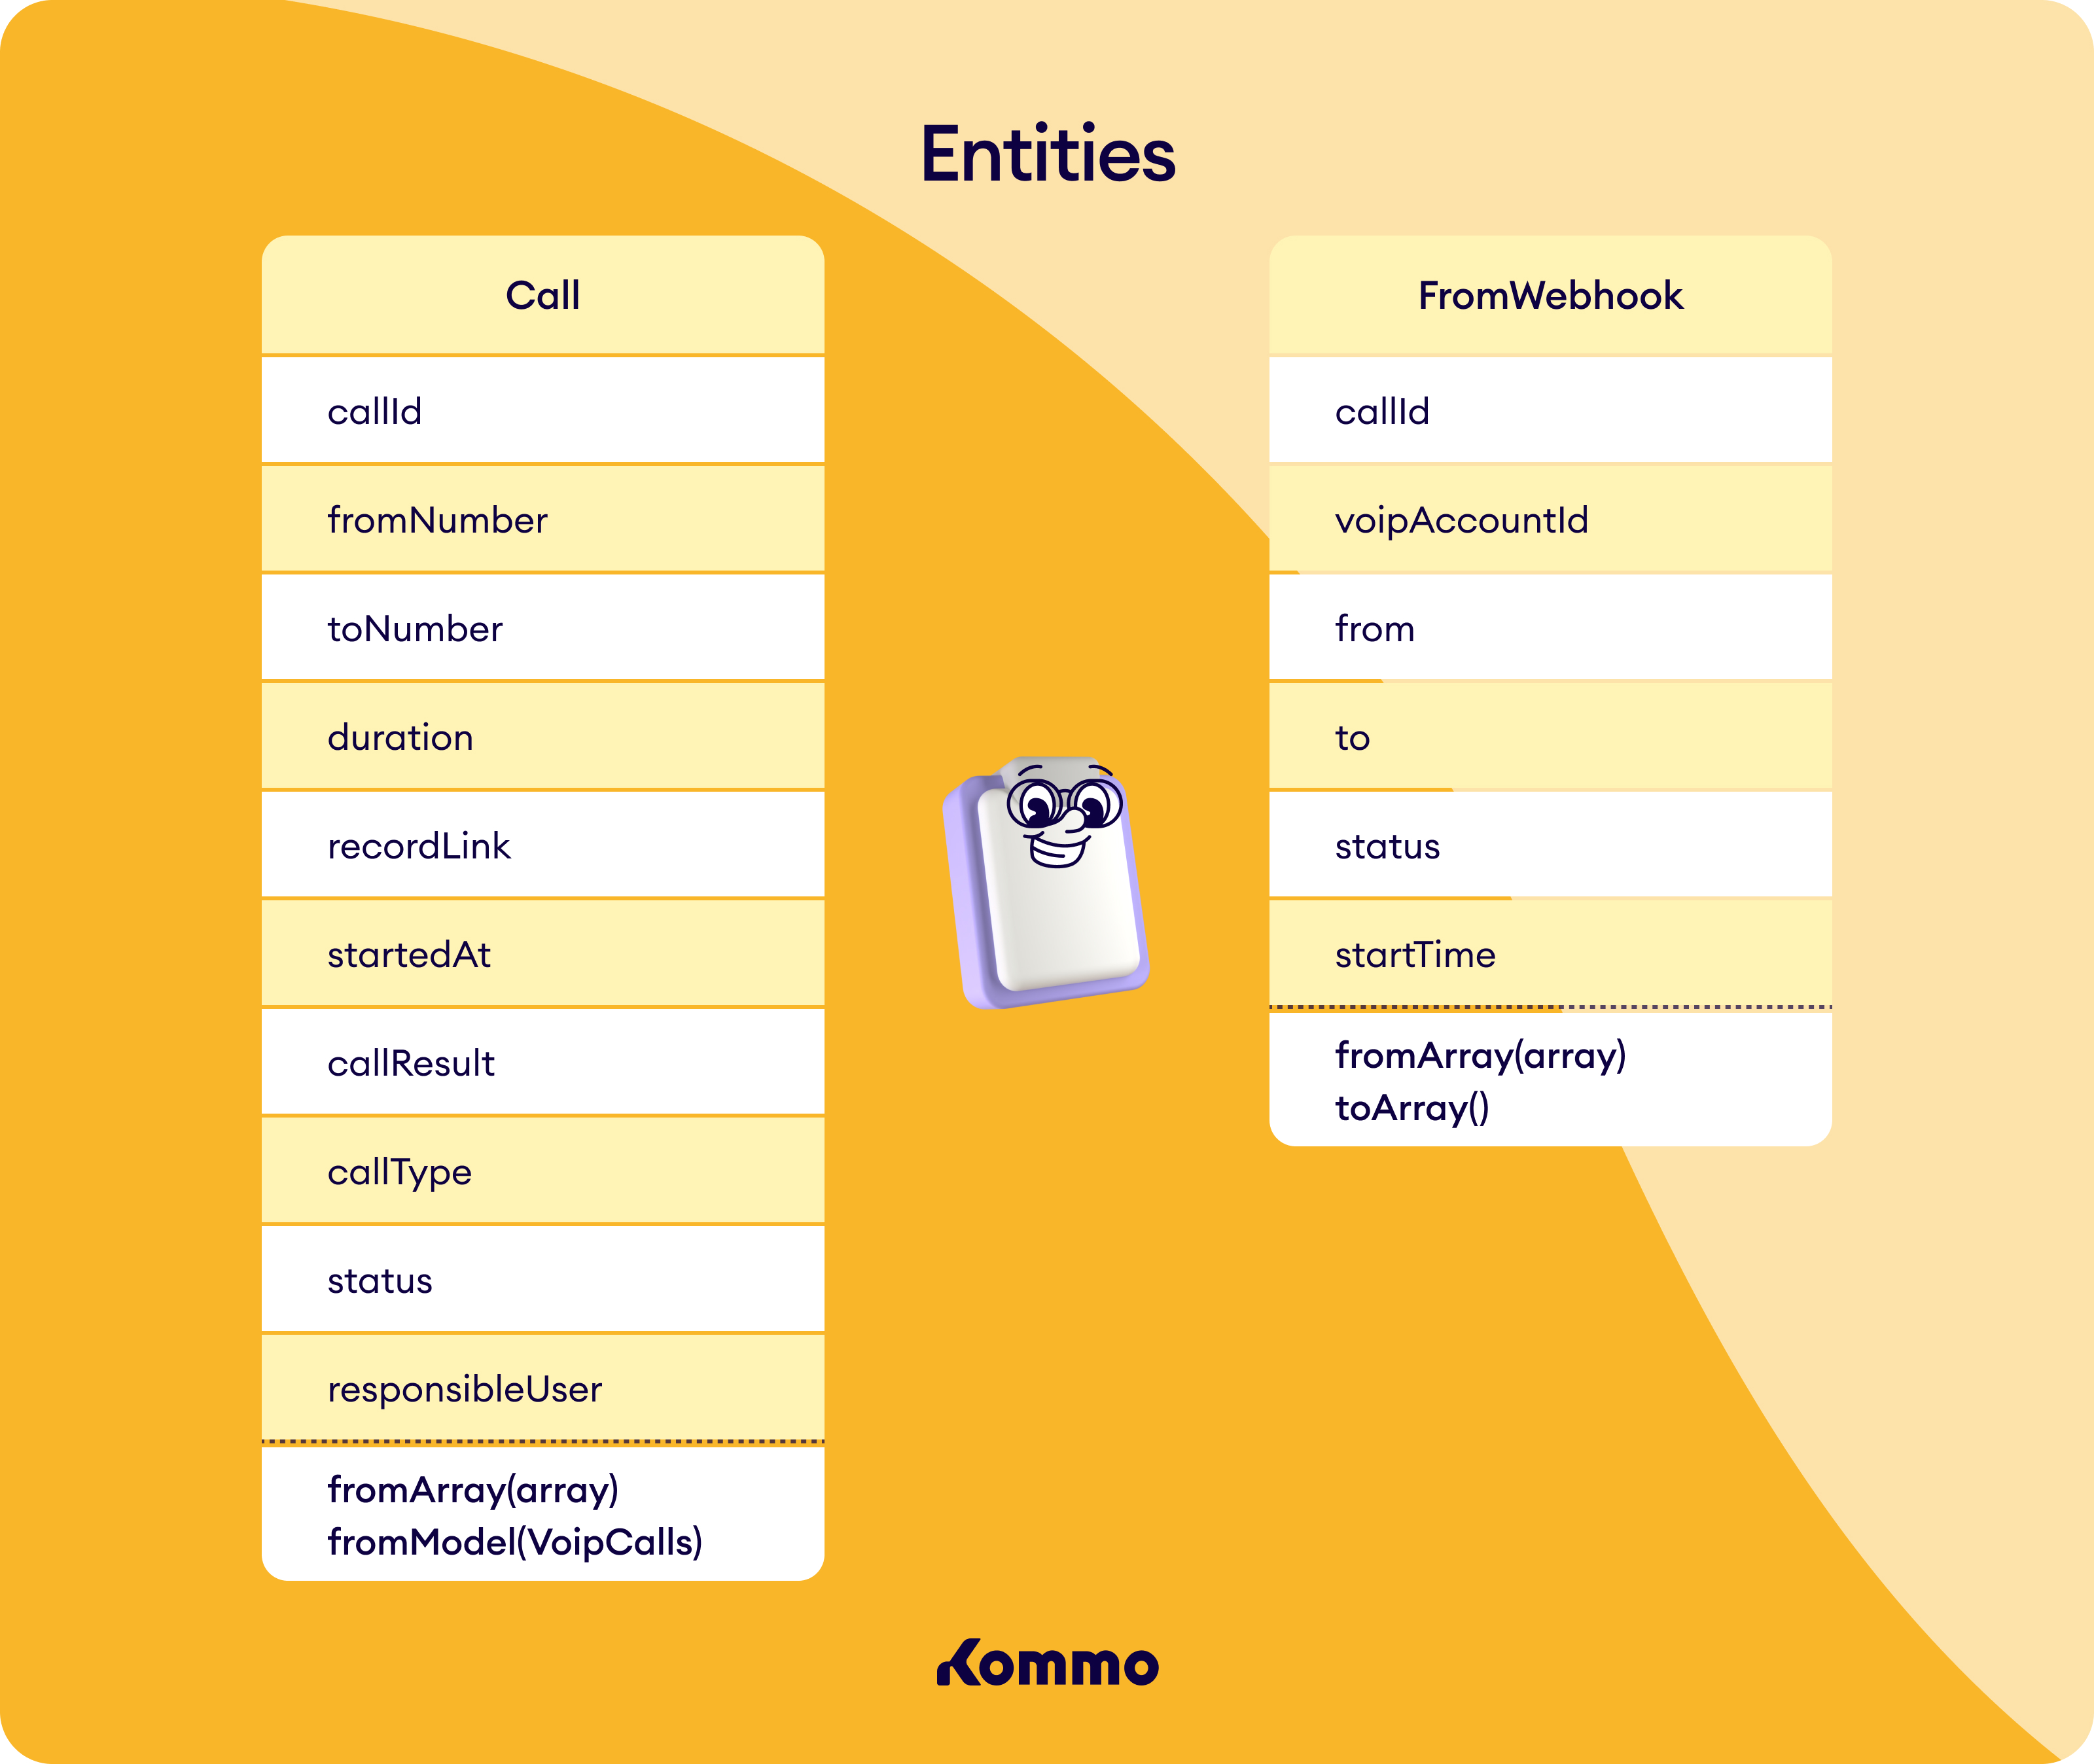
Call
Call| Field | Description |
|---|---|
| callId | Call ID |
| fromNumber | Caller number |
| toNumber | Called number |
| duration | Call duration |
| recordLink | Link to the call recording |
| startedAt | Call start time |
| callResult | Call result note added by the manager |
| callType | Incoming/outgoing call |
| status | Call status |
| responsibleUser | Kommo user ID responsible for the call |
FromWebhook
FromWebhook| Field | Description |
|---|---|
| callId | Сall ID |
| voipAccountId | ID of the VoIP service account |
| from | Caller number |
| to | Called number |
| status | Call status |
| startTime | Call start time |
| extension | The extension number provided by the VoIP service |